This walkthrough shows how to create a traditional Windows desktop application in Visual Studio. The application you create uses the Windows API to display "Hello, Windows desktop!" in a window. You can use the code that you develop in this walkthrough as a pattern to create Windows desktop applications.
The Windows API (also known as the Win32 API, Windows Desktop API, and Windows Classic API) is a C-language-based framework for creating Windows applications. It has been used to create Windows applications for decades. More advanced and easier-to-program frameworks have been built on top of the Windows API. For example, MFC, ATL, the .NET frameworks. Even the most modern Windows Runtime code for UWP and Store apps written in C++/WinRT uses the Windows API underneath. For more information about the Windows API, see Windows API Index.
The Build the code section at the end of this document shows the complete code. This walkthrough covers the various pieces of code that go into a Windows app, but you won't code as you go because some details are omitted in the code snippets to focus on the most important parts. You can copy the complete code and paste it into your project at the end.
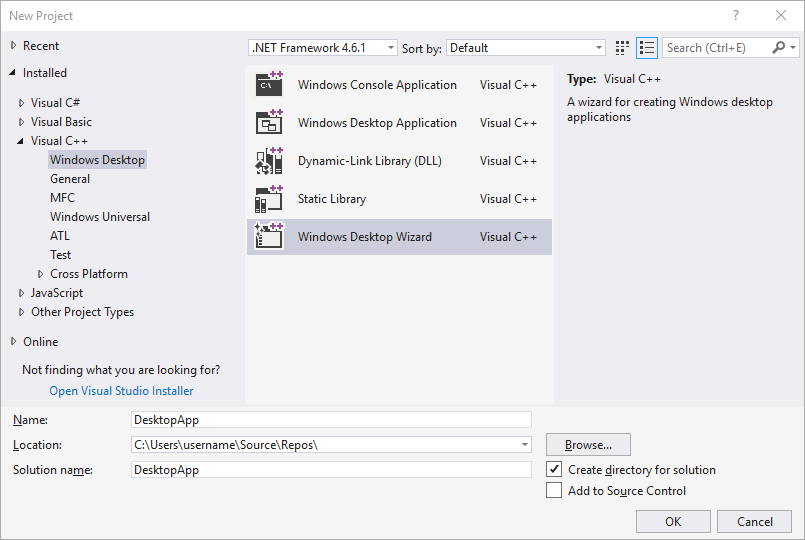
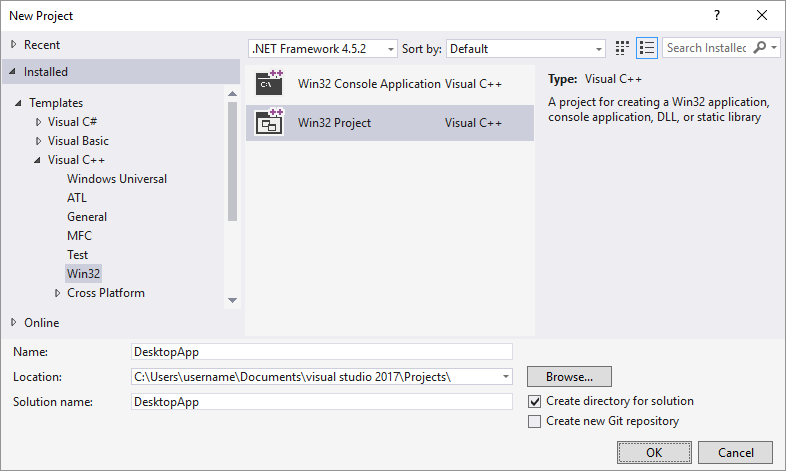
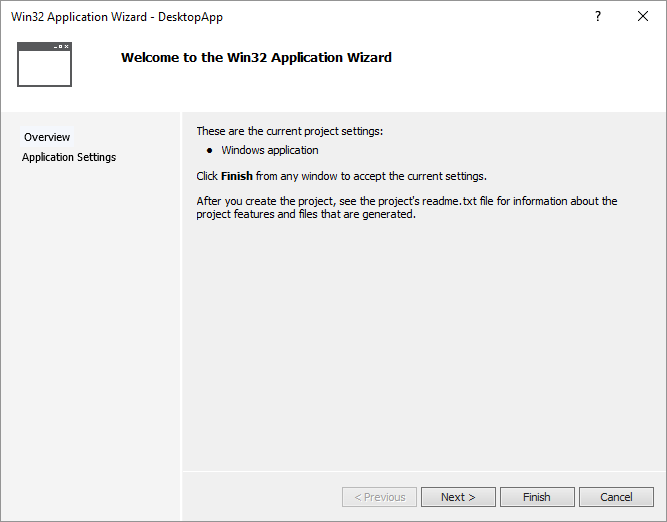
Follow these steps to create your first Windows desktop project. Per the note at the beginning of this walkthrough, the completed code is available in the Build the code section at the end of the walkthrough. Go ahead and follow the steps to create the project, but hold off pasting the following sections of code until the end, when the complete application code is presented. Some details are omitted in the code snippets to focus on the most important parts. You can copy the complete code and paste it into your project at the end.
To simplify the explanation. To see the documentation for your preferred version of Visual Studio, use the Version selector control. It's located at the top of the table of contents on this page.
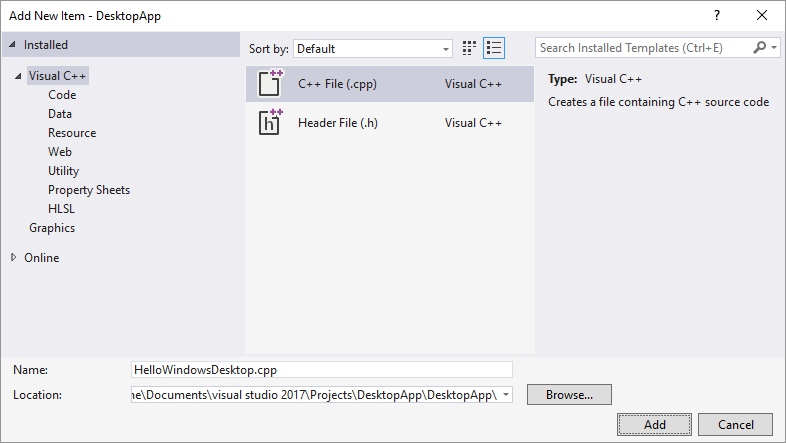
The animation shows right-clicking on the project name in Solution Explorer, choosing Add in the menu that appears, and then choosing New Item.
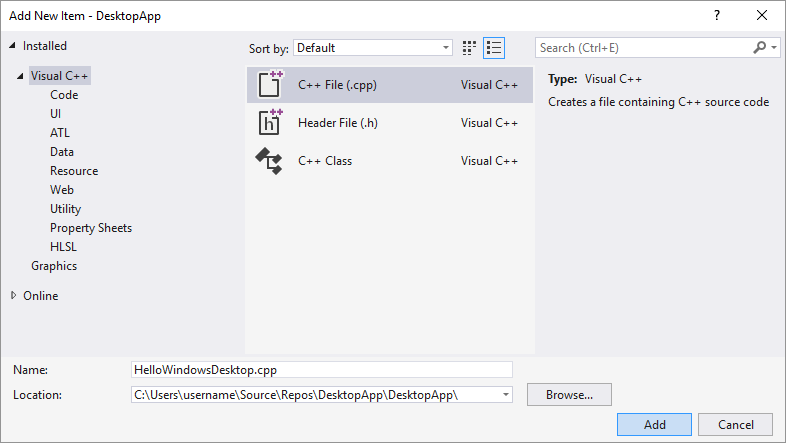
Your project is now created and your source file is opened in the editor.
The animation shows right-clicking on the project name in Solution Explorer, choosing Add in the menu that appeared, and then choosing New Item.
Your project is now created and your source file is opened in the editor.
The animation shows right-clicking on the project name in Solution Explorer, choosing Add in the menu that appears, and then choosing New Item.
Your project is now created and your source file is opened in the editor.
Next, learn how to create the code for a Windows desktop application in Visual Studio.
int WINAPI WinMain( _In_ HINSTANCE hInstance, _In_opt_ HINSTANCE hPrevInstance, _In_ LPSTR lpCmdLine, _In_ int nCmdShow ); Note What are all those extra words, such as WINAPI , or CALLBACK , or HINSTANCE , or _In_ ? The traditional Windows API uses typedefs and preprocessor macros extensively to abstract away some of the details of types and platform-specific code, such as calling conventions, __declspec declarations, and compiler pragmas. In Visual Studio, you can use the IntelliSense Quick Info feature to see what these typedefs and macros define. Hover your mouse over the word of interest, or select it and press Ctrl+K, Ctrl+I for a small pop-up window that contains the definition. For more information, see Using IntelliSense. Parameters and return types often use SAL Annotations to help you catch programming errors. For more information, see Using SAL Annotations to Reduce C/C++ Code Defects.
#include #include
LRESULT CALLBACK WndProc( _In_ HWND hWnd, _In_ UINT message, _In_ WPARAM wParam, _In_ LPARAM lParam ); WNDCLASSEX wcex; wcex.cbSize = sizeof(WNDCLASSEX); wcex.style = CS_HREDRAW | CS_VREDRAW; wcex.lpfnWndProc = WndProc; wcex.cbClsExtra = 0; wcex.cbWndExtra = 0; wcex.hInstance = hInstance; wcex.hIcon = LoadIcon(wcex.hInstance, IDI_APPLICATION); wcex.hCursor = LoadCursor(NULL, IDC_ARROW); wcex.hbrBackground = (HBRUSH)(COLOR_WINDOW+1); wcex.lpszMenuName = NULL; wcex.lpszClassName = szWindowClass; wcex.hIconSm = LoadIcon(wcex.hInstance, IDI_APPLICATION); if (!RegisterClassEx(&wcex))
static TCHAR szWindowClass[] = _T("DesktopApp"); static TCHAR szTitle[] = _T("Windows Desktop Guided Tour Application"); // The parameters to CreateWindowEx explained: // WS_EX_OVERLAPPEDWINDOW : An optional extended window style. // szWindowClass: the name of the application // szTitle: the text that appears in the title bar // WS_OVERLAPPEDWINDOW: the type of window to create // CW_USEDEFAULT, CW_USEDEFAULT: initial position (x, y) // 500, 100: initial size (width, length) // NULL: the parent of this window // NULL: this application does not have a menu bar // hInstance: the first parameter from WinMain // NULL: not used in this application HWND hWnd = CreateWindowEx( WS_EX_OVERLAPPEDWINDOW, szWindowClass, szTitle, WS_OVERLAPPEDWINDOW, CW_USEDEFAULT, CW_USEDEFAULT, 500, 100, NULL, NULL, hInstance, NULL ); if (!hWnd)
// The parameters to ShowWindow explained: // hWnd: the value returned from CreateWindow // nCmdShow: the fourth parameter from WinMain ShowWindow(hWnd, nCmdShow); UpdateWindow(hWnd); MSG msg; while (GetMessage(&msg, NULL, 0, 0)) < TranslateMessage(&msg); DispatchMessage(&msg); >return (int) msg.wParam; For more information about the structures and functions in the message loop, see MSG , GetMessage , TranslateMessage, and DispatchMessage . A basic WinMain function that creates the application's main window, and listens for messages that Windows sends your app, would resemble the following code:
int WINAPI WinMain(HINSTANCE hInstance, HINSTANCE hPrevInstance, LPSTR lpCmdLine, int nCmdShow) < WNDCLASSEX wcex; wcex.cbSize = sizeof(WNDCLASSEX); wcex.style = CS_HREDRAW | CS_VREDRAW; wcex.lpfnWndProc = WndProc; wcex.cbClsExtra = 0; wcex.cbWndExtra = 0; wcex.hInstance = hInstance; wcex.hIcon = LoadIcon(wcex.hInstance, IDI_APPLICATION); wcex.hCursor = LoadCursor(NULL, IDC_ARROW); wcex.hbrBackground = (HBRUSH)(COLOR_WINDOW+1); wcex.lpszMenuName = NULL; wcex.lpszClassName = szWindowClass; wcex.hIconSm = LoadIcon(wcex.hInstance, IDI_APPLICATION); if (!RegisterClassEx(&wcex)) < MessageBox(NULL, _T("Call to RegisterClassEx failed!"), _T("Windows Desktop Guided Tour"), NULL); return 1; >// Store instance handle in our global variable hInst = hInstance; // The parameters to CreateWindowEx explained: // WS_EX_OVERLAPPEDWINDOW : An optional extended window style. // szWindowClass: the name of the application // szTitle: the text that appears in the title bar // WS_OVERLAPPEDWINDOW: the type of window to create // CW_USEDEFAULT, CW_USEDEFAULT: initial position (x, y) // 500, 100: initial size (width, length) // NULL: the parent of this window // NULL: this application dows not have a menu bar // hInstance: the first parameter from WinMain // NULL: not used in this application HWND hWnd = CreateWindowEx( WS_EX_OVERLAPPEDWINDOW, szWindowClass, szTitle, WS_OVERLAPPEDWINDOW, CW_USEDEFAULT, CW_USEDEFAULT, 500, 100, NULL, NULL, hInstance, NULL ); if (!hWnd) < MessageBox(NULL, _T("Call to CreateWindow failed!"), _T("Windows Desktop Guided Tour"), NULL); return 1; >// The parameters to ShowWindow explained: // hWnd: the value returned from CreateWindow // nCmdShow: the fourth parameter from WinMain ShowWindow(hWnd, nCmdShow); UpdateWindow(hWnd); // Main message loop: MSG msg; while (GetMessage(&msg, NULL, 0, 0)) < TranslateMessage(&msg); DispatchMessage(&msg); >return (int) msg.wParam; > PAINTSTRUCT ps; HDC hdc; TCHAR greeting[] = _T("Hello, Windows desktop!"); switch (message) < case WM_PAINT: hdc = BeginPaint(hWnd, &ps); // Here your application is laid out. // For this introduction, we just print out "Hello, Windows desktop!" // in the top left corner. TextOut(hdc, 5, 5, greeting, _tcslen(greeting)); // End application-specific layout section. EndPaint(hWnd, &ps); break; >LRESULT CALLBACK WndProc(HWND hWnd, UINT message, WPARAM wParam, LPARAM lParam) < PAINTSTRUCT ps; HDC hdc; TCHAR greeting[] = _T("Hello, Windows desktop!"); switch (message) < case WM_PAINT: hdc = BeginPaint(hWnd, &ps); // Here your application is laid out. // For this introduction, we just print out "Hello, Windows desktop!" // in the top left corner. TextOut(hdc, 5, 5, greeting, _tcslen(greeting)); // End application specific layout section. EndPaint(hWnd, &ps); break; case WM_DESTROY: PostQuitMessage(0); break; default: return DefWindowProc(hWnd, message, wParam, lParam); break; >return 0; > As promised, the complete code for the working application follows.
// HelloWindowsDesktop.cpp // compile with: /D_UNICODE /DUNICODE /DWIN32 /D_WINDOWS /c #include #include #include #include // Global variables // The main window class name. static TCHAR szWindowClass[] = _T("DesktopApp"); // The string that appears in the application's title bar. static TCHAR szTitle[] = _T("Windows Desktop Guided Tour Application"); // Stored instance handle for use in Win32 API calls such as FindResource HINSTANCE hInst; // Forward declarations of functions included in this code module: LRESULT CALLBACK WndProc(HWND, UINT, WPARAM, LPARAM); int WINAPI WinMain( _In_ HINSTANCE hInstance, _In_opt_ HINSTANCE hPrevInstance, _In_ LPSTR lpCmdLine, _In_ int nCmdShow ) < WNDCLASSEX wcex; wcex.cbSize = sizeof(WNDCLASSEX); wcex.style = CS_HREDRAW | CS_VREDRAW; wcex.lpfnWndProc = WndProc; wcex.cbClsExtra = 0; wcex.cbWndExtra = 0; wcex.hInstance = hInstance; wcex.hIcon = LoadIcon(wcex.hInstance, IDI_APPLICATION); wcex.hCursor = LoadCursor(NULL, IDC_ARROW); wcex.hbrBackground = (HBRUSH)(COLOR_WINDOW+1); wcex.lpszMenuName = NULL; wcex.lpszClassName = szWindowClass; wcex.hIconSm = LoadIcon(wcex.hInstance, IDI_APPLICATION); if (!RegisterClassEx(&wcex)) < MessageBox(NULL, _T("Call to RegisterClassEx failed!"), _T("Windows Desktop Guided Tour"), NULL); return 1; >// Store instance handle in our global variable hInst = hInstance; // The parameters to CreateWindowEx explained: // WS_EX_OVERLAPPEDWINDOW : An optional extended window style. // szWindowClass: the name of the application // szTitle: the text that appears in the title bar // WS_OVERLAPPEDWINDOW: the type of window to create // CW_USEDEFAULT, CW_USEDEFAULT: initial position (x, y) // 500, 100: initial size (width, length) // NULL: the parent of this window // NULL: this application does not have a menu bar // hInstance: the first parameter from WinMain // NULL: not used in this application HWND hWnd = CreateWindowEx( WS_EX_OVERLAPPEDWINDOW, szWindowClass, szTitle, WS_OVERLAPPEDWINDOW, CW_USEDEFAULT, CW_USEDEFAULT, 500, 100, NULL, NULL, hInstance, NULL ); if (!hWnd) < MessageBox(NULL, _T("Call to CreateWindow failed!"), _T("Windows Desktop Guided Tour"), NULL); return 1; >// The parameters to ShowWindow explained: // hWnd: the value returned from CreateWindow // nCmdShow: the fourth parameter from WinMain ShowWindow(hWnd, nCmdShow); UpdateWindow(hWnd); // Main message loop: MSG msg; while (GetMessage(&msg, NULL, 0, 0)) < TranslateMessage(&msg); DispatchMessage(&msg); >return (int) msg.wParam; > // FUNCTION: WndProc(HWND, UINT, WPARAM, LPARAM) // // PURPOSE: Processes messages for the main window. // // WM_PAINT - Paint the main window // WM_DESTROY - post a quit message and return LRESULT CALLBACK WndProc(HWND hWnd, UINT message, WPARAM wParam, LPARAM lParam) < PAINTSTRUCT ps; HDC hdc; TCHAR greeting[] = _T("Hello, Windows desktop!"); switch (message) < case WM_PAINT: hdc = BeginPaint(hWnd, &ps); // Here your application is laid out. // For this introduction, we just print out "Hello, Windows desktop!" // in the top left corner. TextOut(hdc, 5, 5, greeting, _tcslen(greeting)); // End application-specific layout section. EndPaint(hWnd, &ps); break; case WM_DESTROY: PostQuitMessage(0); break; default: return DefWindowProc(hWnd, message, wParam, lParam); break; >return 0; > The animation shows clicking the save all button, then choosing Build > Build Solution from the main menu.
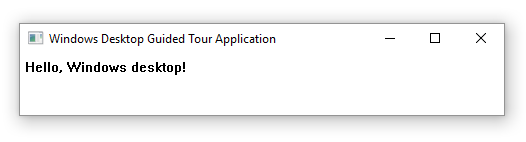 Guided Tour Application. The contents of the window are Hello, Windows desktop!." />
Congratulations! You've built a traditional Windows desktop application.