Wall-mount planters are ever more popular in cities, where industrious gardeners must make use of every inch of outdoor space. But their appeal stretches well beyond the urban jungle. A striking floral installation can brighten a big blank wall, take advantage of sunlight that never reaches the ground, and, best of all, keep you off your knees. Our original design is a simple grid with lattice sections for climbing vines and horizontal rails that function as French cleats, making it easy to change the position of planter boxes or bring them indoors for winter—great for, say, tending herbs. Follow along as senior technical editor Mark Powers walks you through the steps to becoming a vertical gardener.
Shown: Planters, Grey Zinc Window Boxes, from $13; jamaligarden.com. Perennials: provenwinners.com
Download a cut list or a plant guide of Bulletproof Perennials.
Day 1: Build the frame and shelves (Steps 2–8).
Day 2: Hang and plant the garden (Steps 9–13).
Cut list
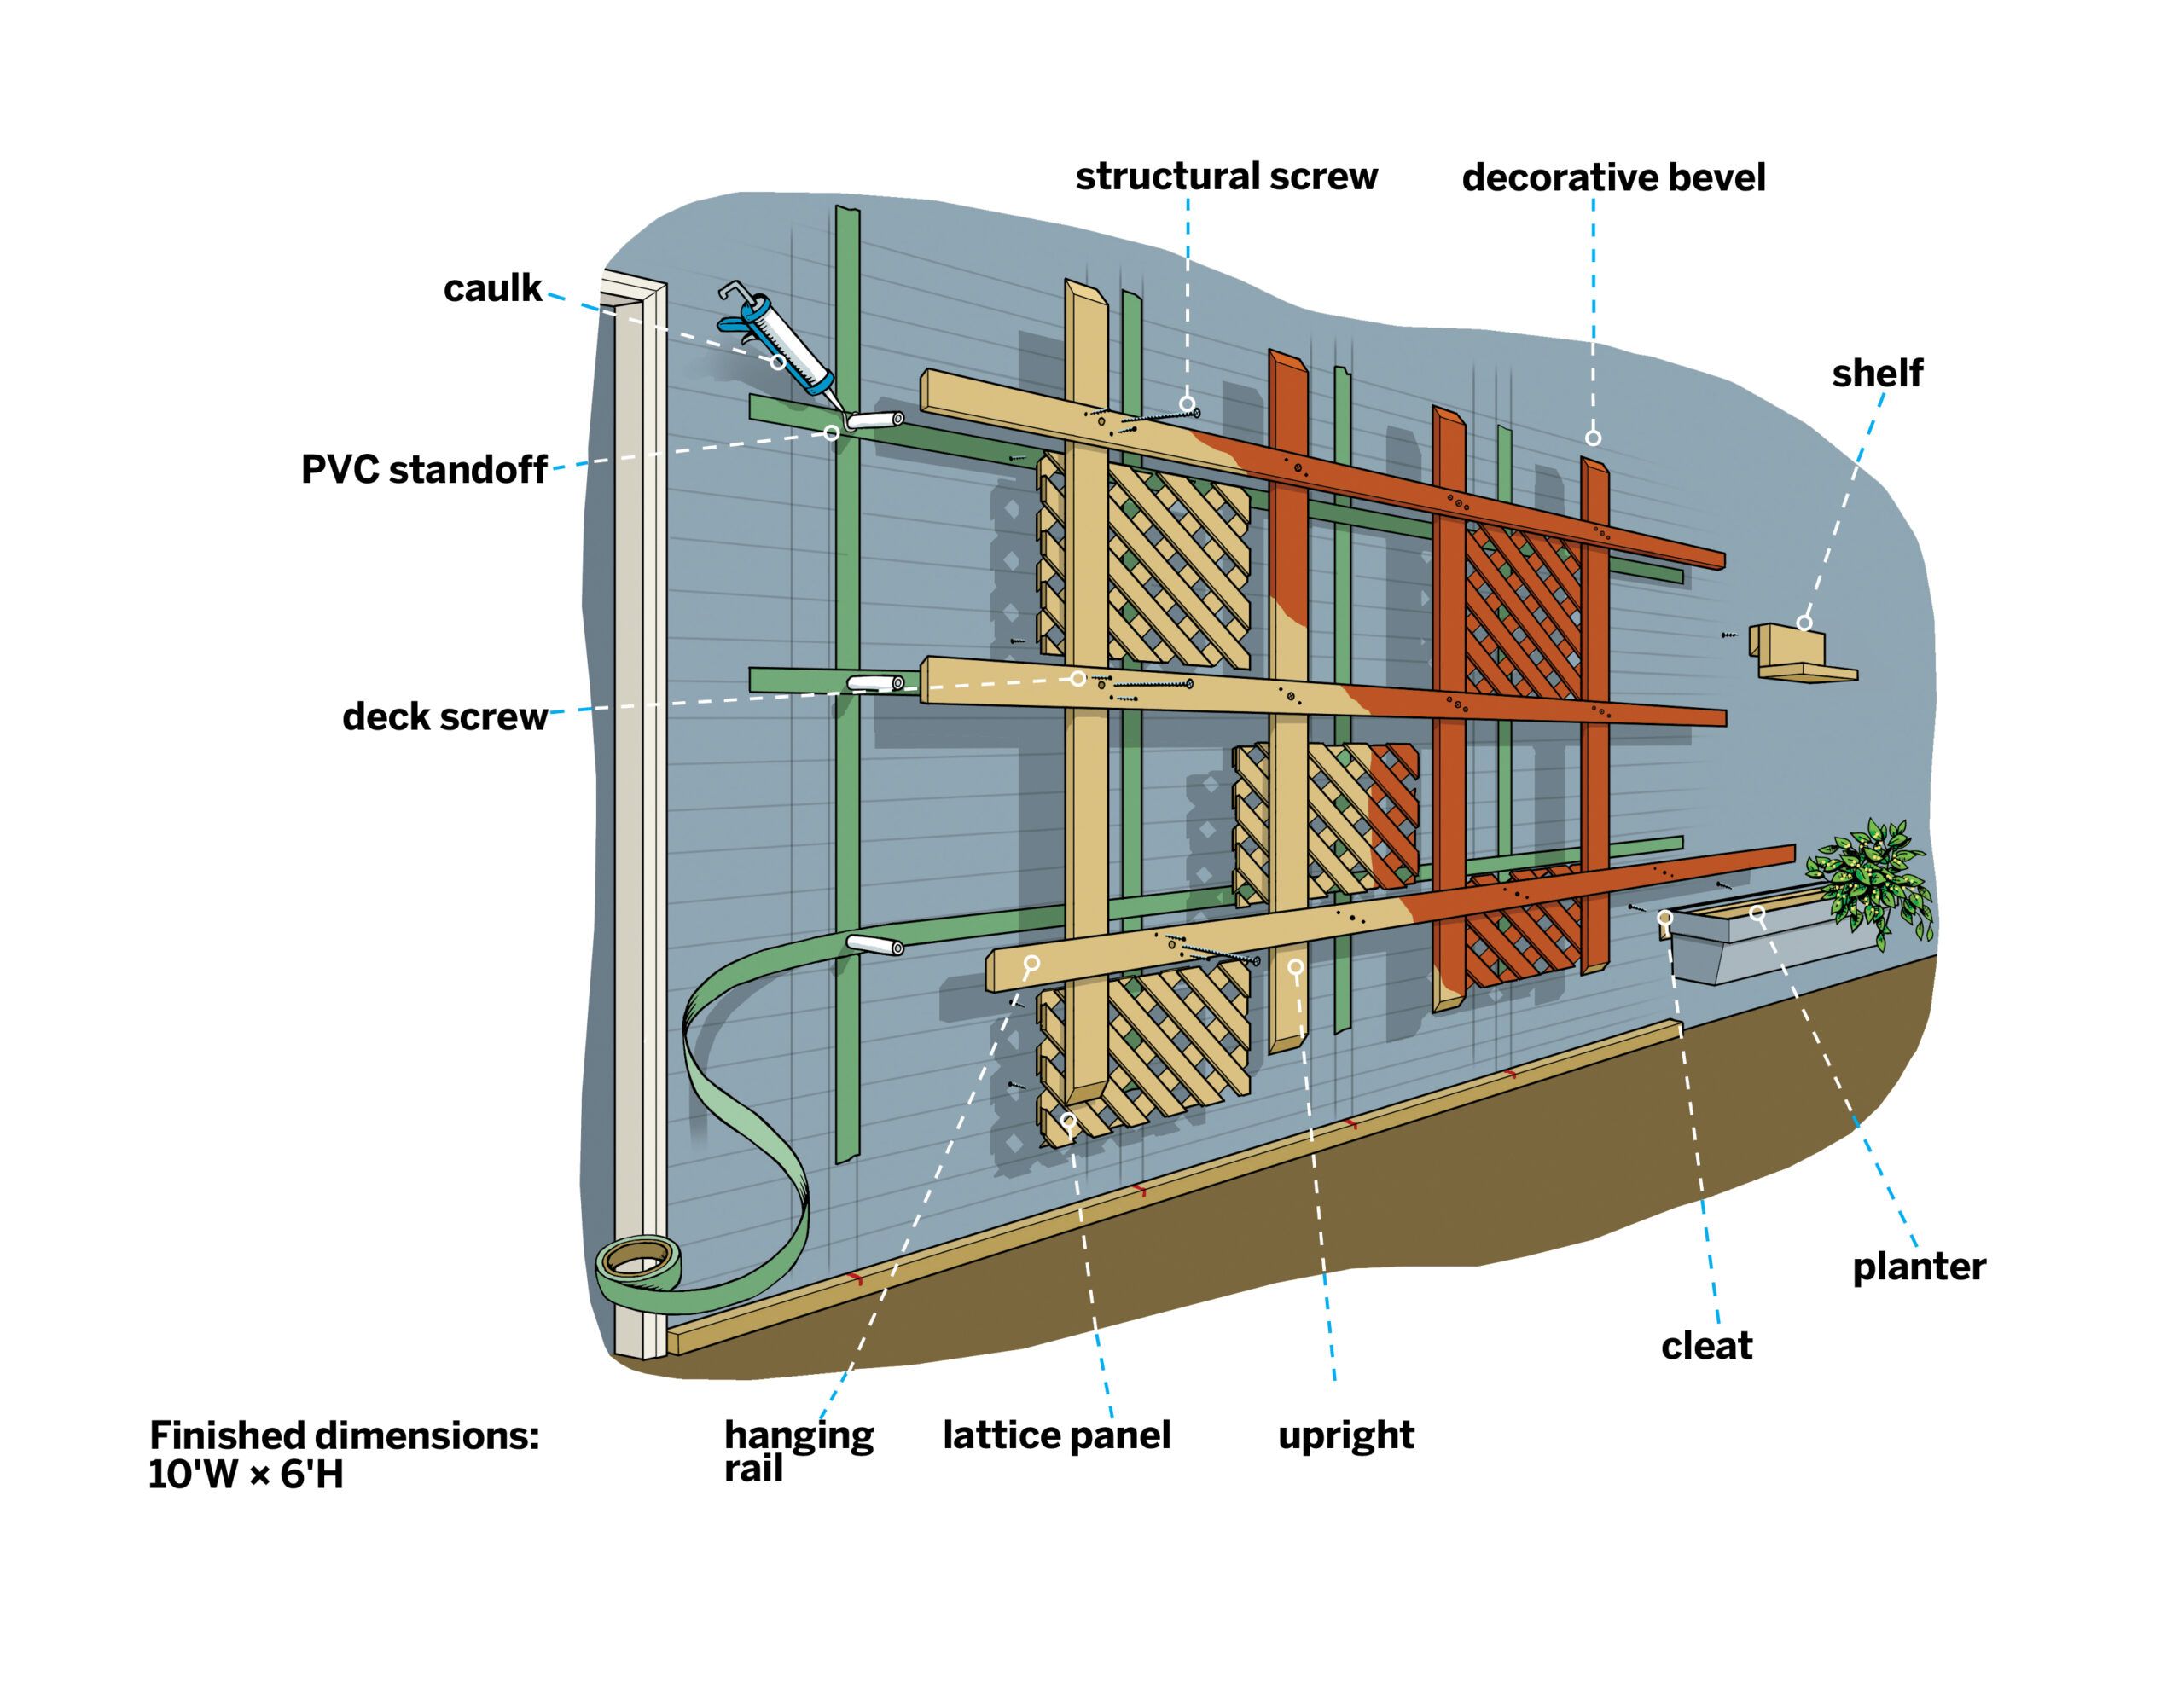
1×6 pressure-treated-pine rails, four at 12 feet ripped in half on a 45-degree angle
1×4 pressure-treated-pine uprights, five at 8 feet with beveled ends
1×2 pressure-treated-pine nailing blocks, cut to fit (after using the 1×2 as your story stick)
2×4 lumber braces, cut to fit
½-inch lattice panels, cut to fit
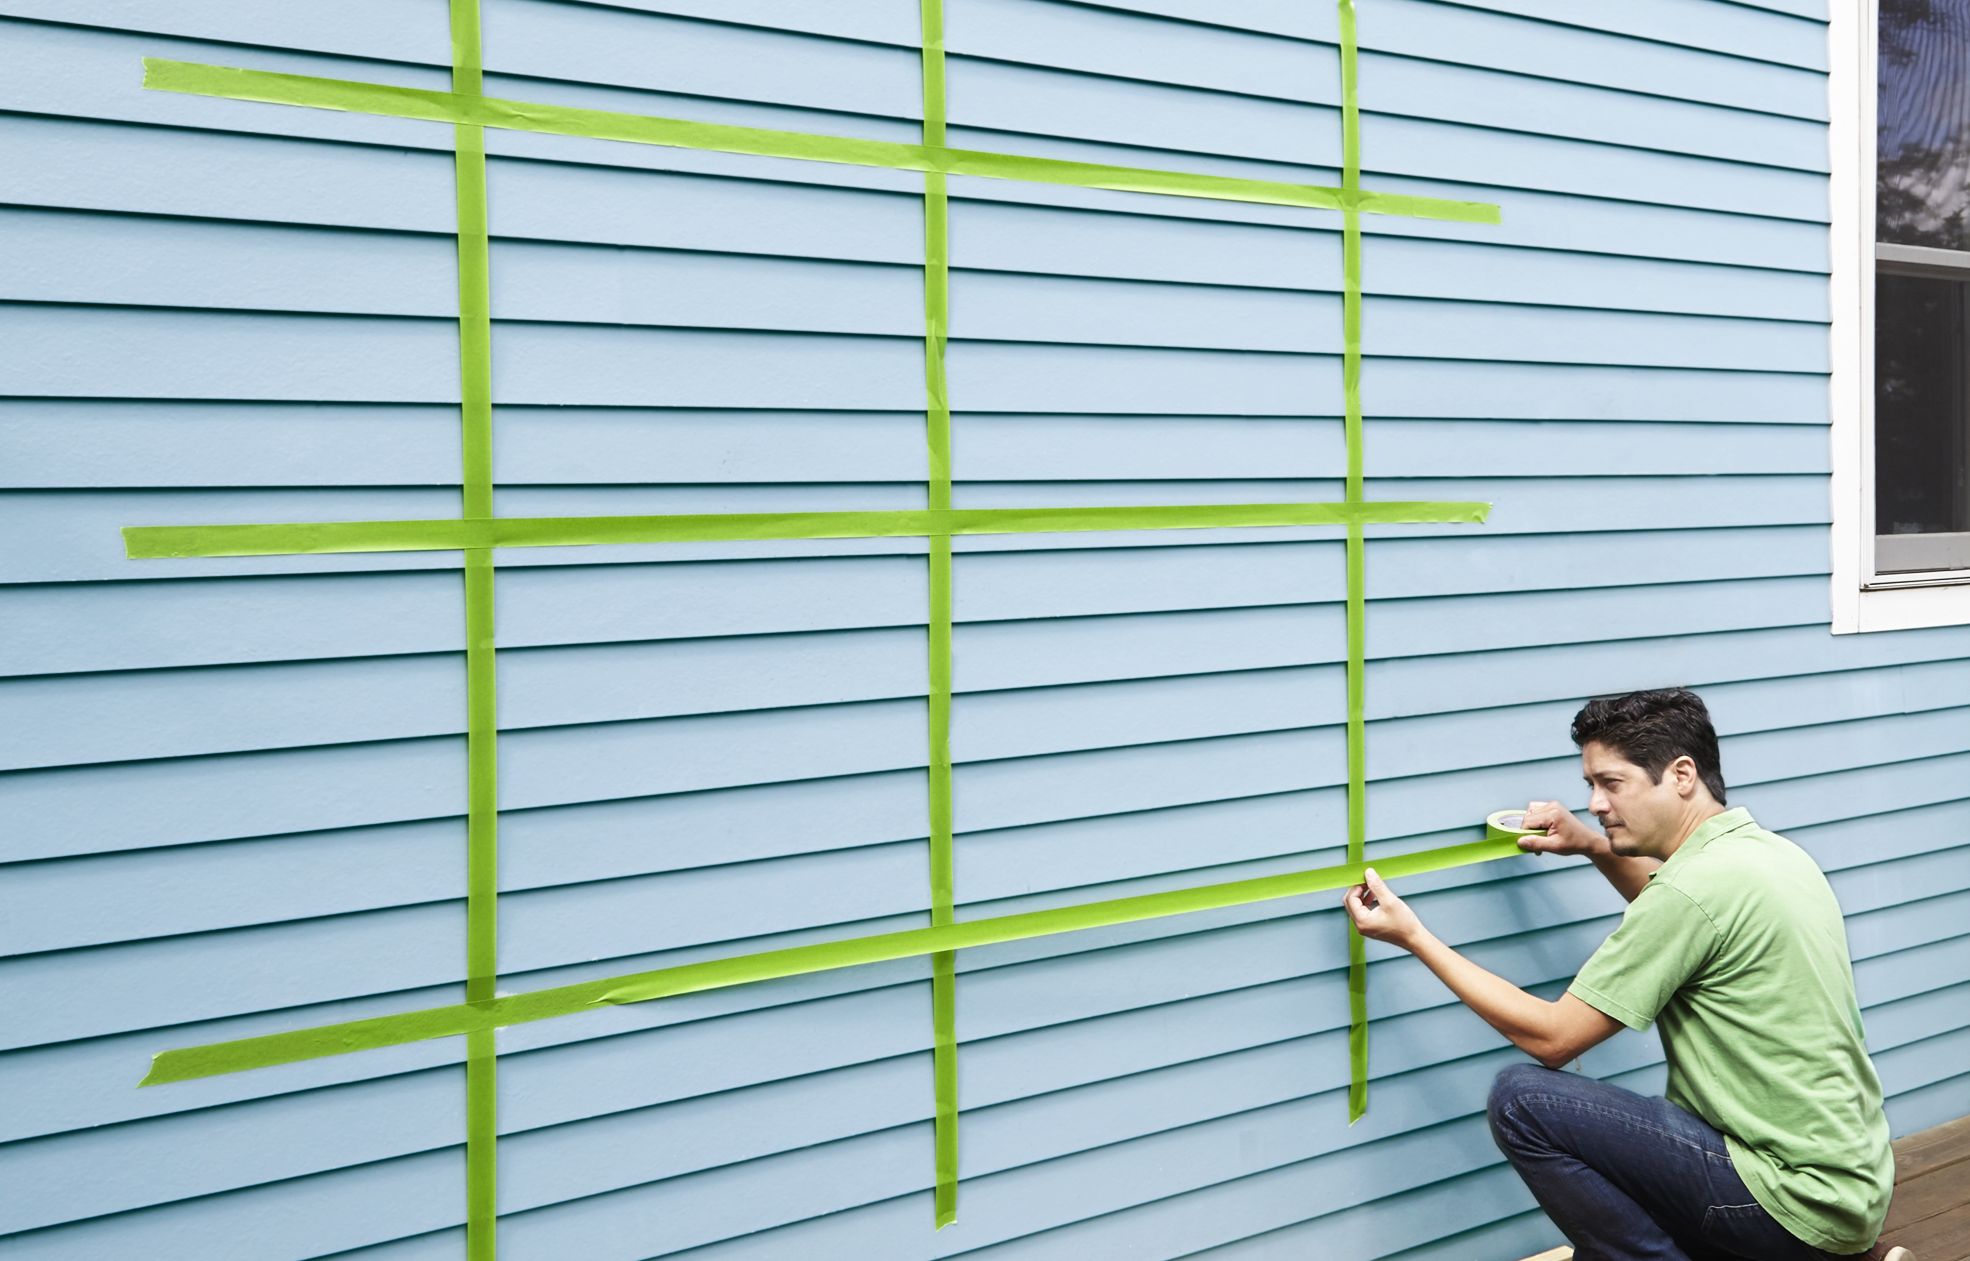
Locate the studs on the interior wall and mark them with painter’s tape. Now use the 1×2 as a story stick for pinpointing the locations on the exterior: Even up the end of the stick with the jamb of a door or window inside, mark the stud locations on it, then take it outside, line it up with the same jamb, and transfer the marks to the siding. Now use painter’s tape and the 4-foot level to design the planter frame on the siding, aligning at least two of the uprights with studs.
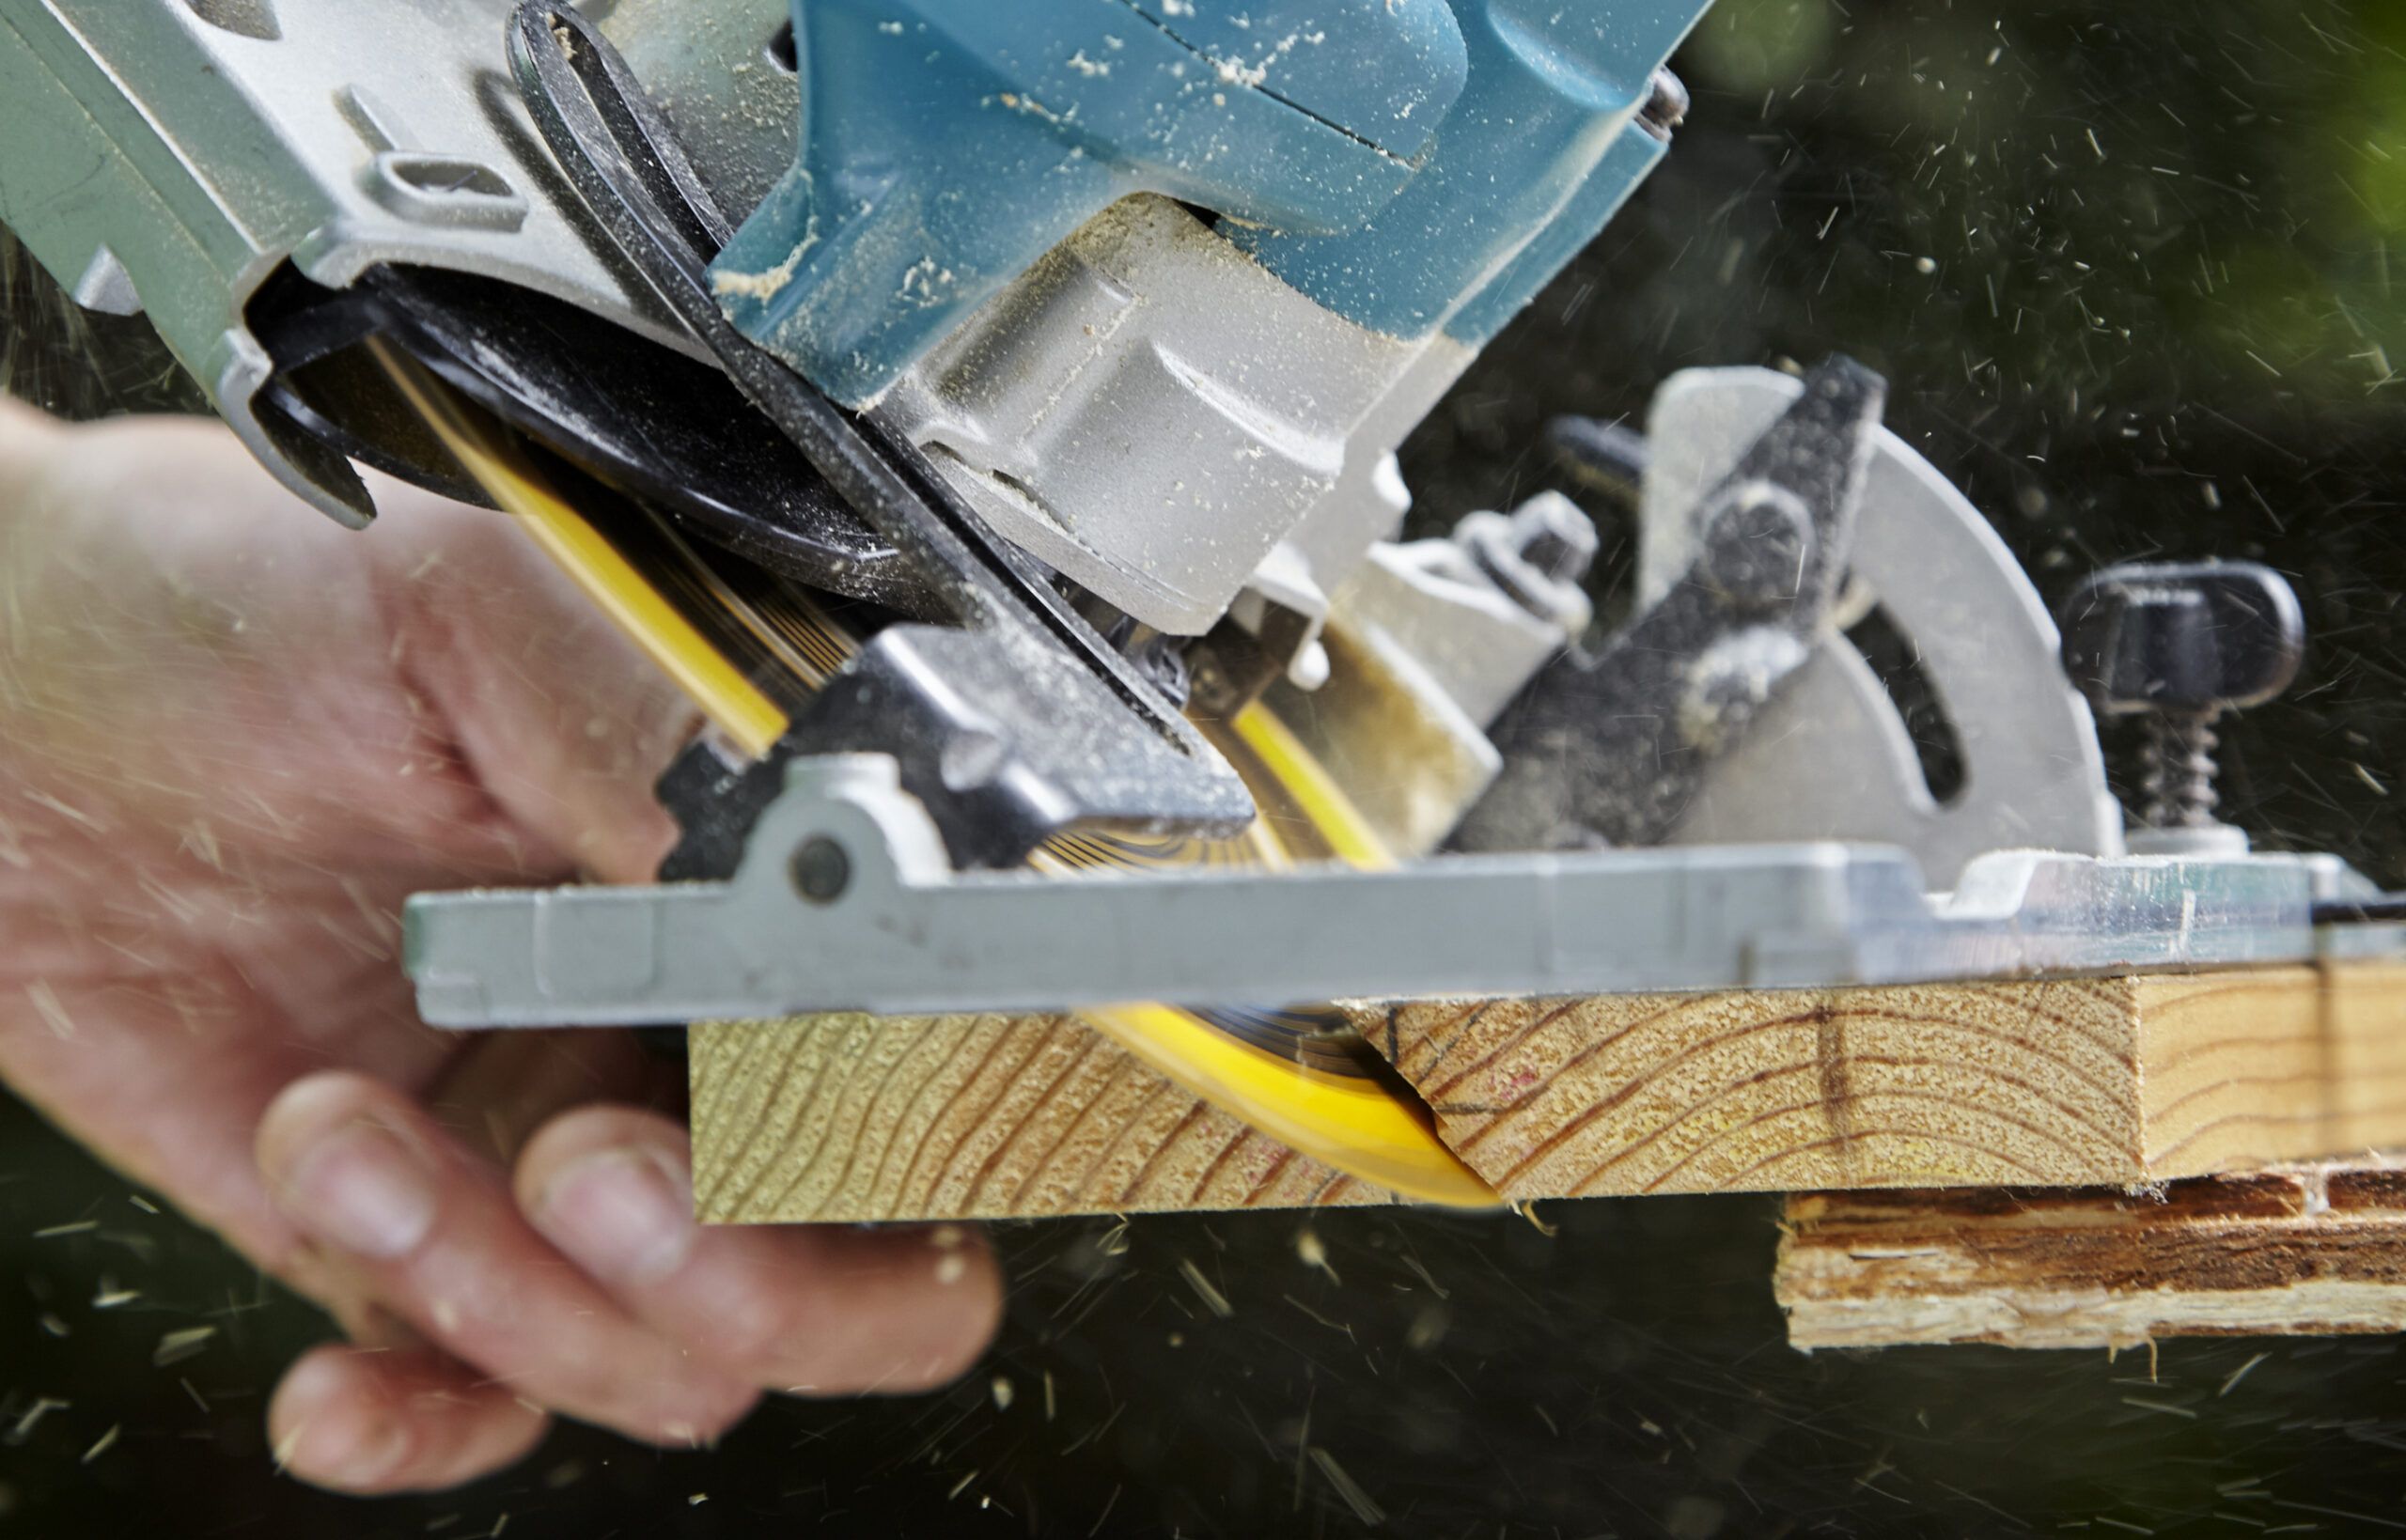
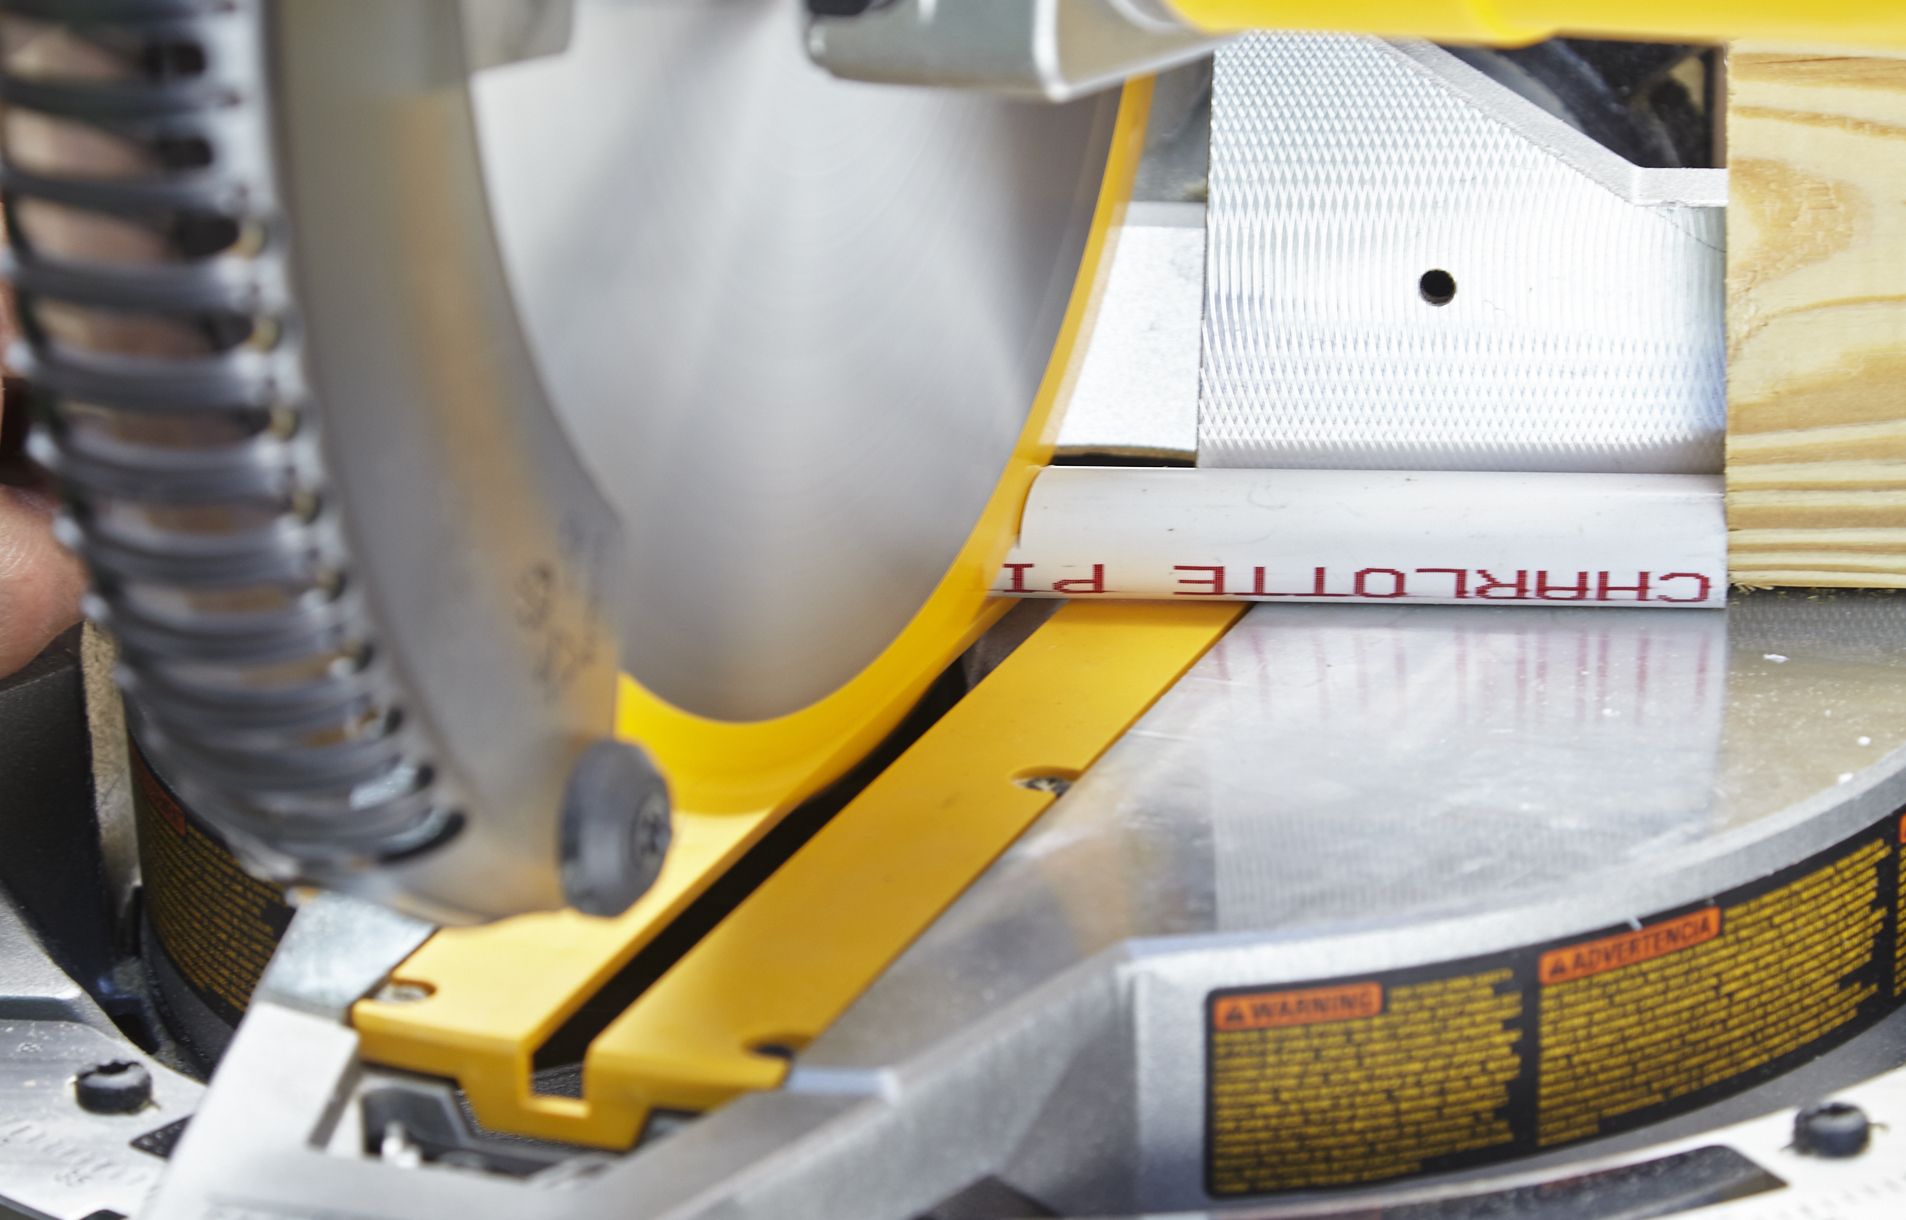
Clamp a 1×6 to the edge of a work surface, mark the centerline of the board’s width on its end, then set the combination square to ⅜ inch and use it to make a perpendicular mark across the first line. Set the circular saw to cut at a 45° bevel, adjust the fence so that the blade hits the intersection of the two marks, and rip down the length of the board, as shown. Each beveled half is a single hanging rail. Cut them to the desired length, and save the offcuts to make planter and shelf cleats.
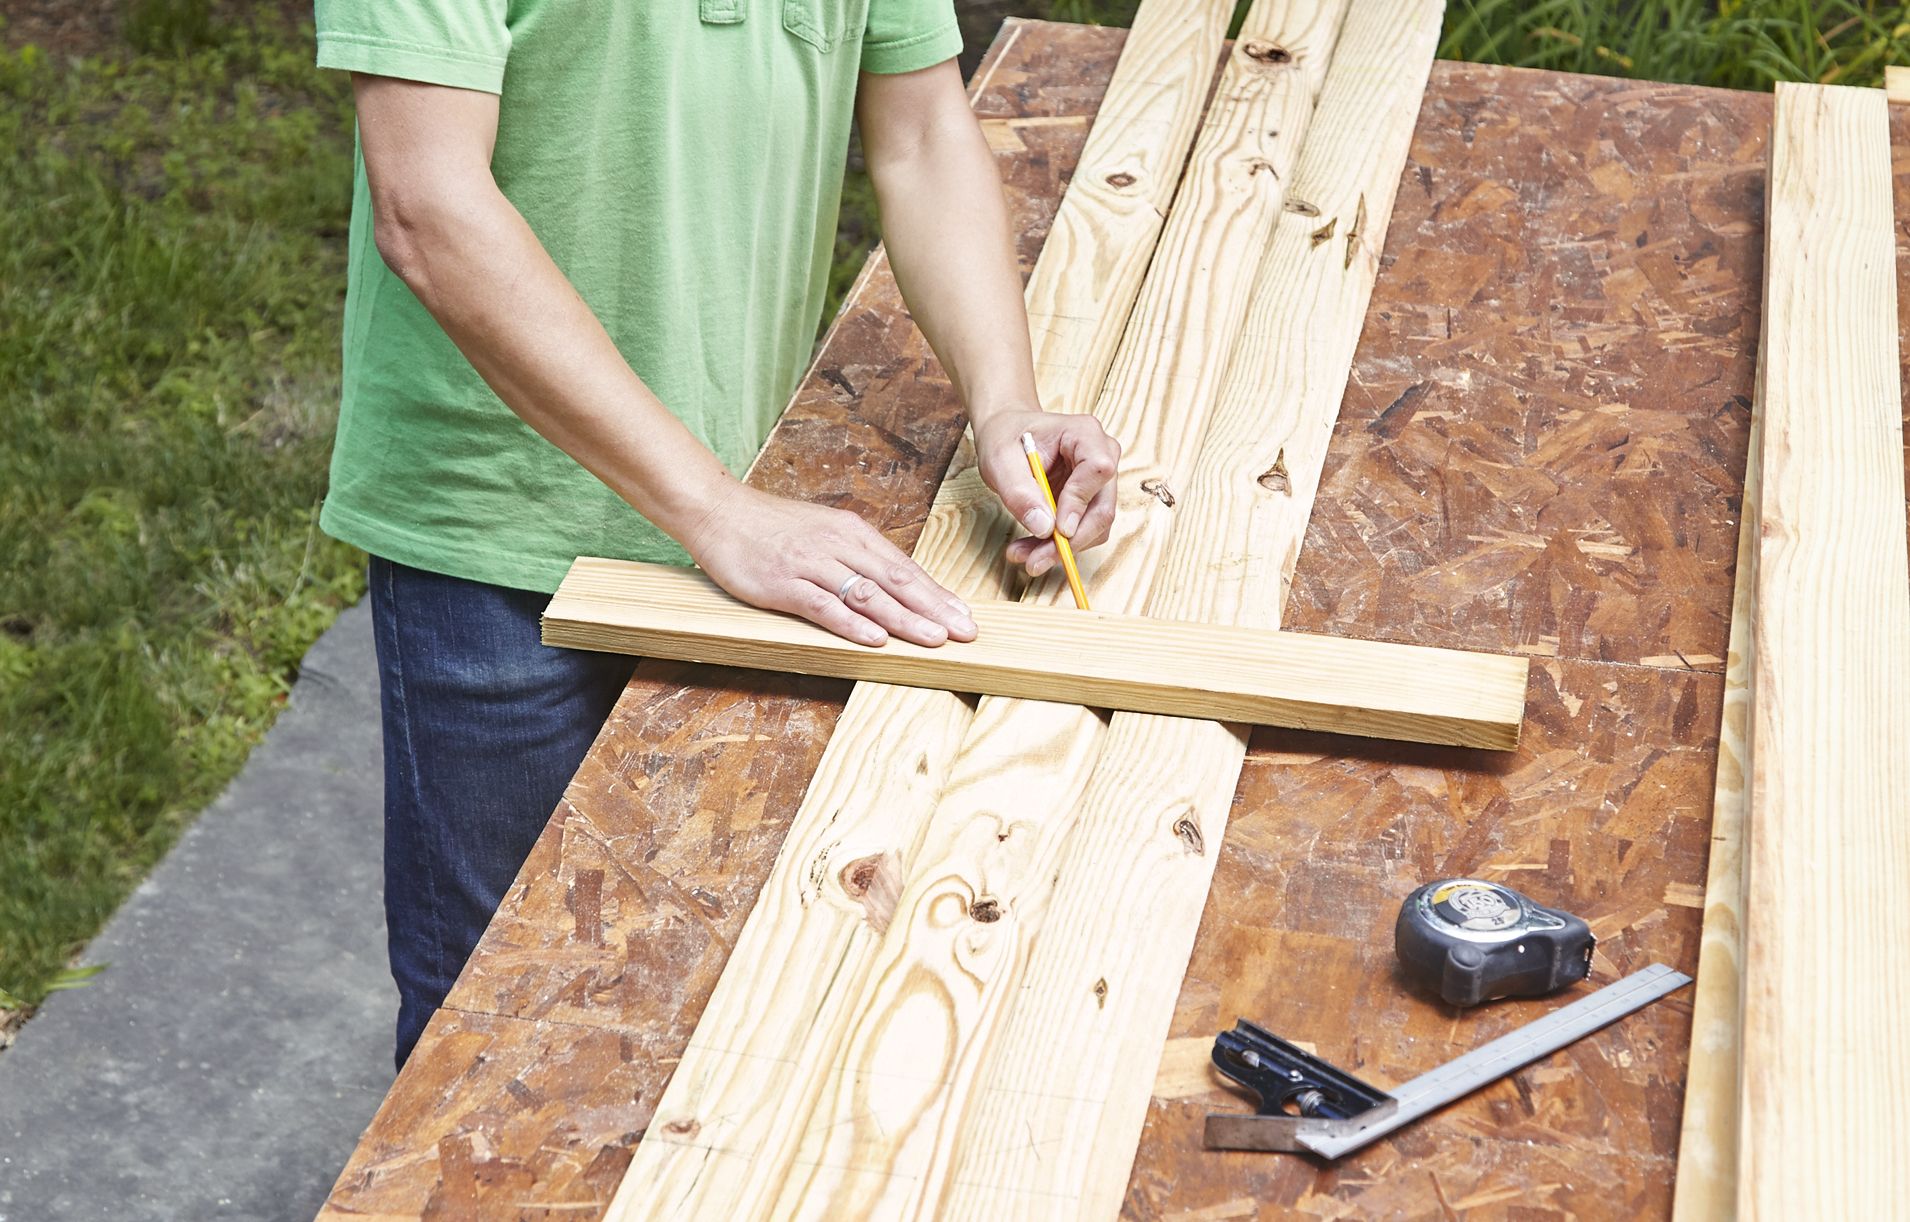
Use the circular saw to cut the uprights to length, making a decorative 45° bevel at each end. Gang the rails together on the work surface, bevel up and ends flush. Use the combination square to mark where the uprights should cross the rails, based on your layout, then line up a 1×4 scrap with the marks and draw a line across the board faces.
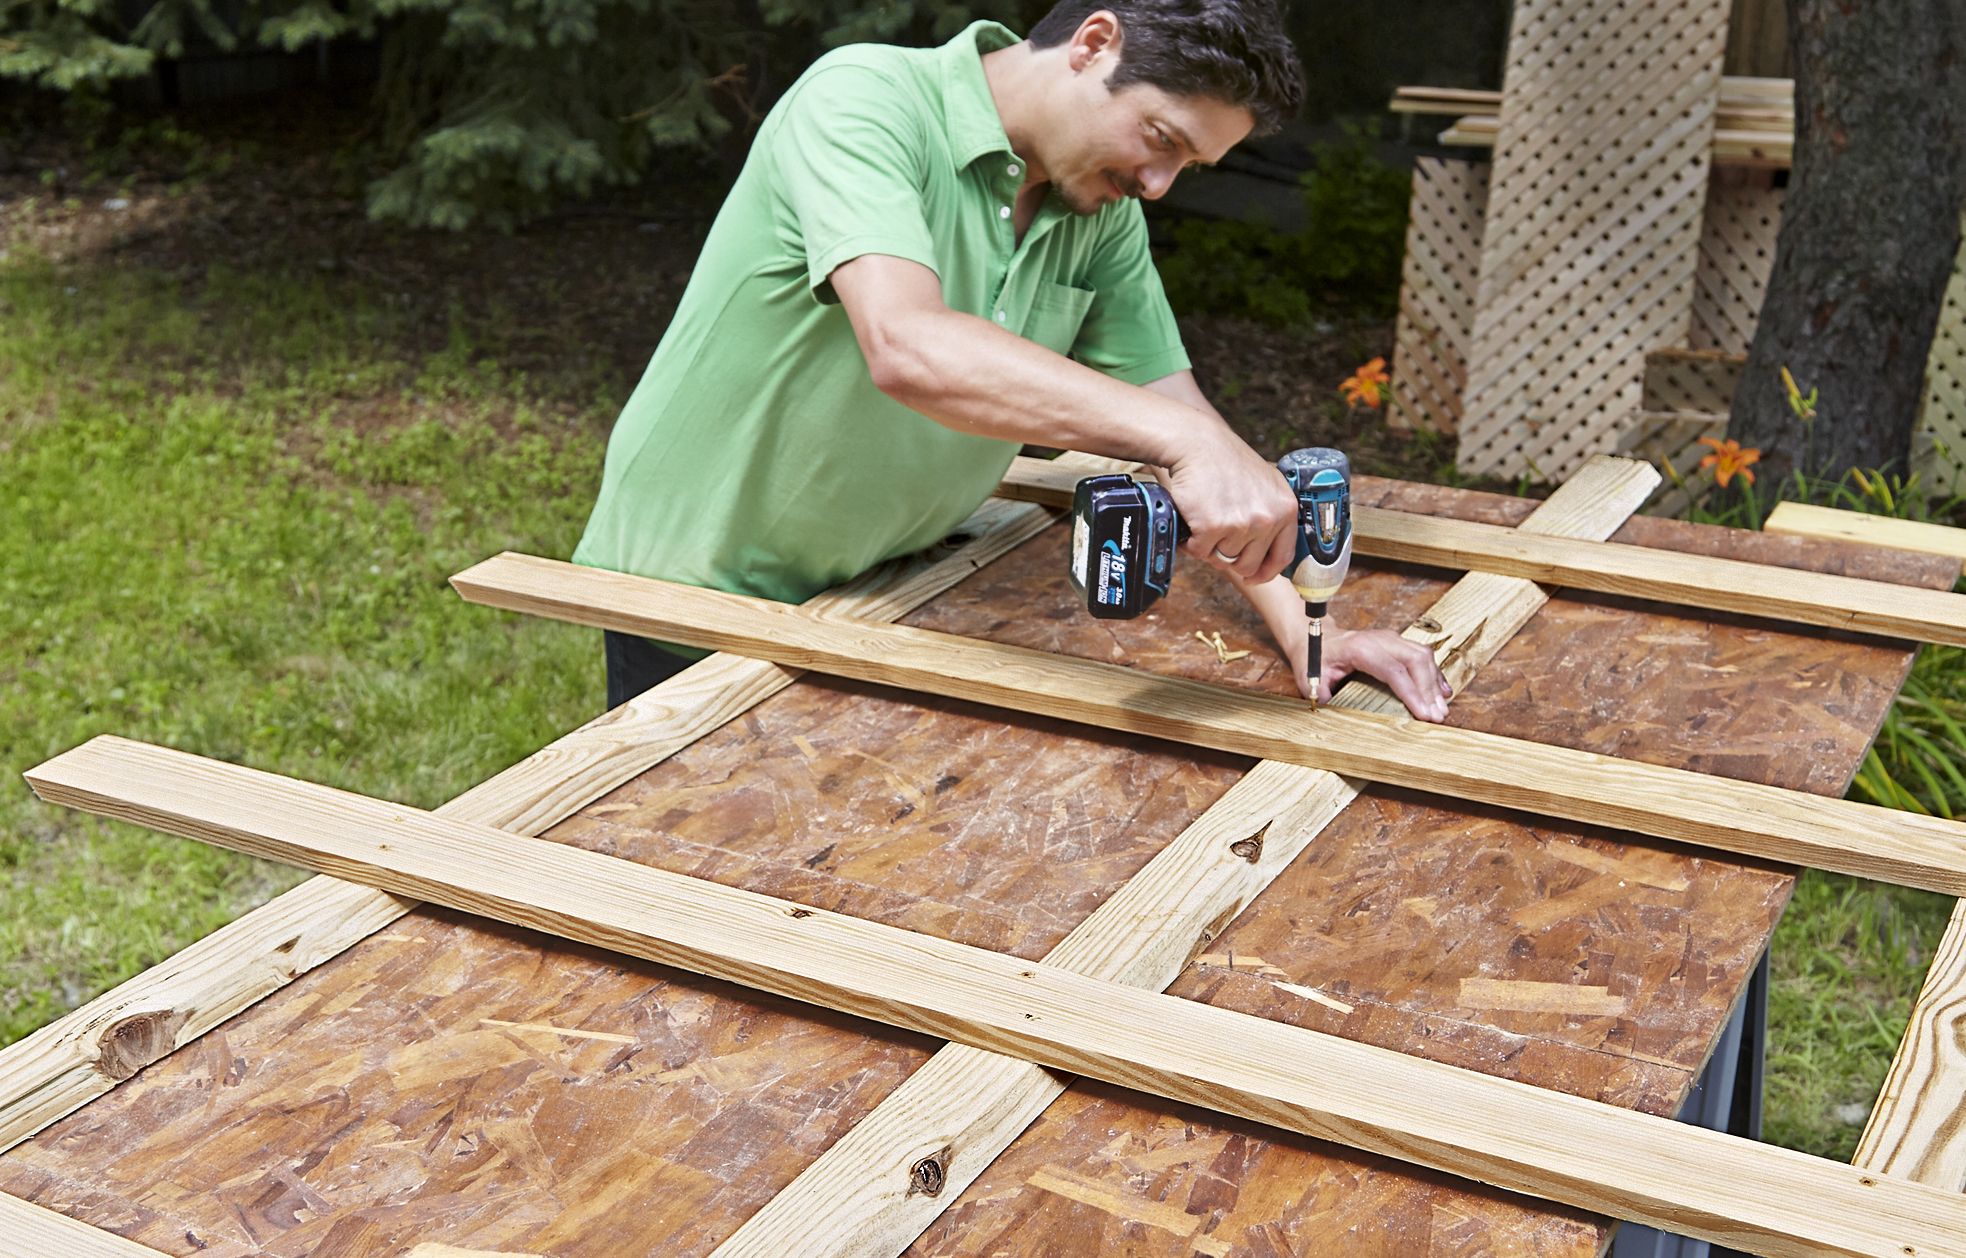
With their beveled edges facing up, fan out the rails to create equal spacing between them, making sure they’re at least 12 inches apart to allow room for the plants and planters. Lay the uprights across the rails at their marks, with their beveled ends facing down and overhanging the top and bottom equally. Drill two pilot holes through the upright and into the rail at opposite corners of each intersection, leaving the center clear for the structural screws. Fasten the uprights to the rails with 1¼-inch deck screws.
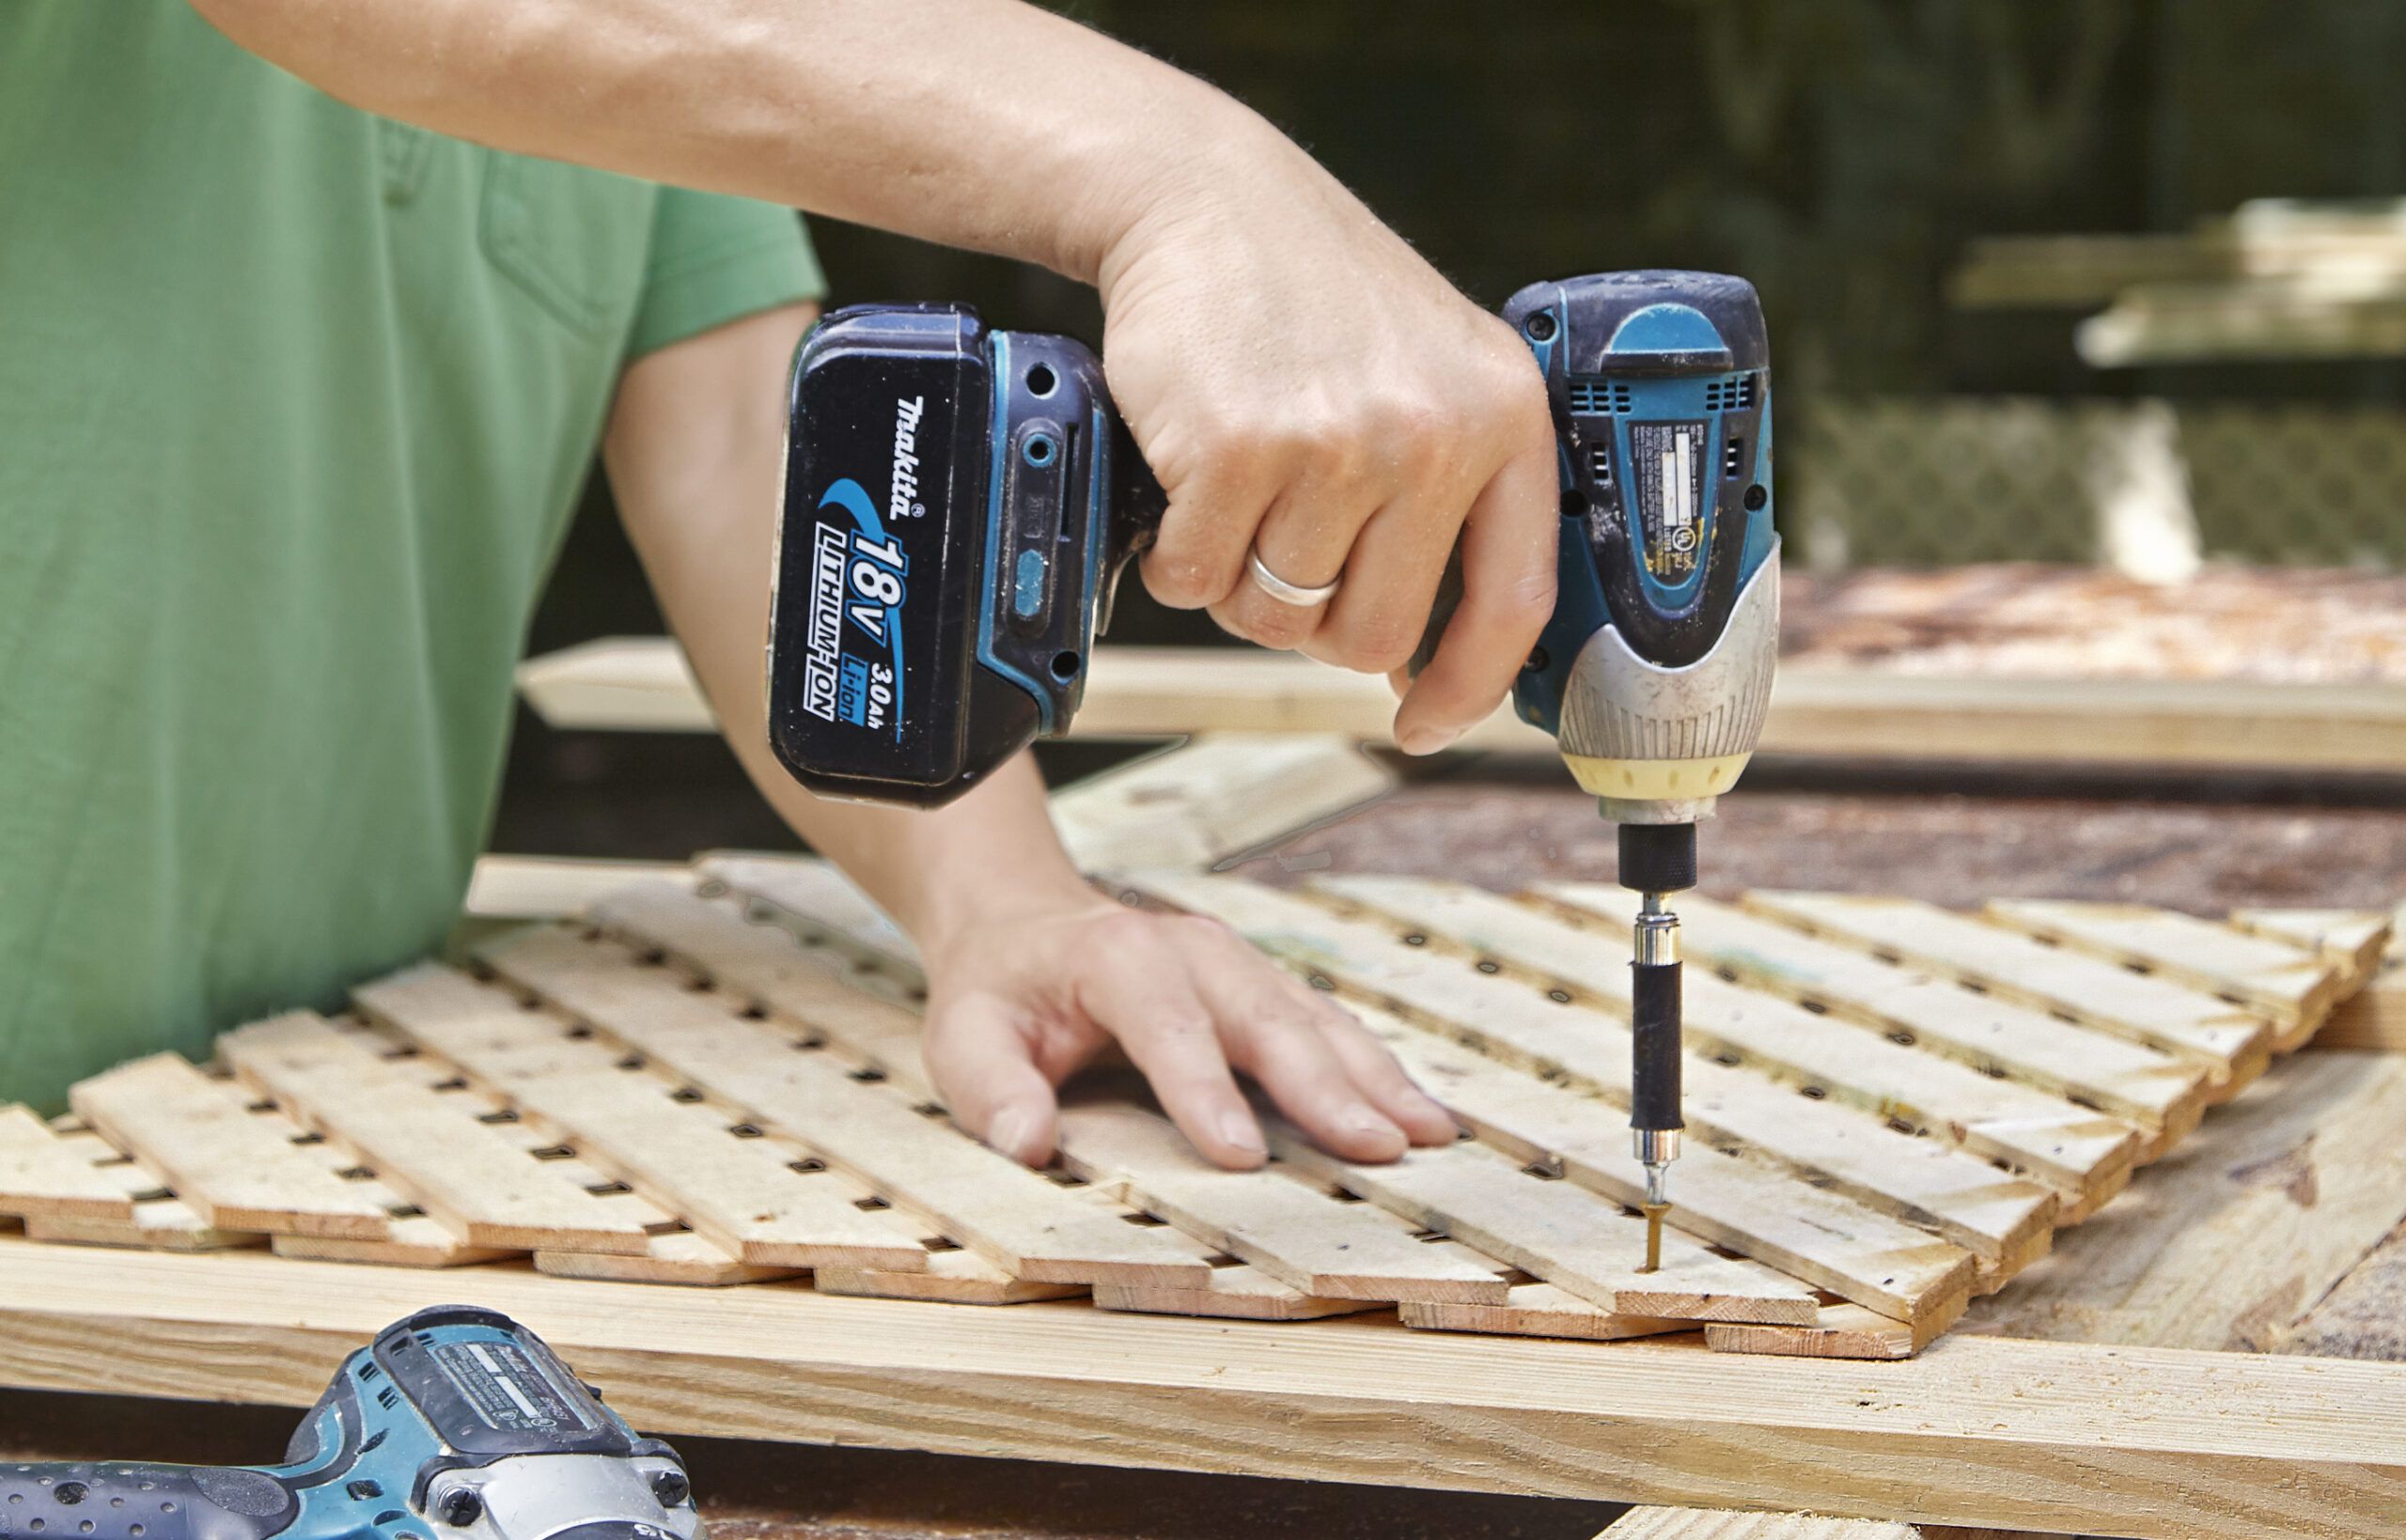
Measure the spaces that you want to cover with lattice, and add 1 inch to all four sides to create an overlap with the rails and uprights. Mark a sheet of lattice, clamp it to a work surface, and cut the panels to size with the circular saw. Dry-fit the panels, then drill pilot holes through the top layer of lattice and into the uprights before securing them with deck screws. Treat the finished frame by brushing on two coats of exterior stain, allowing the first coat to dry before applying the second.
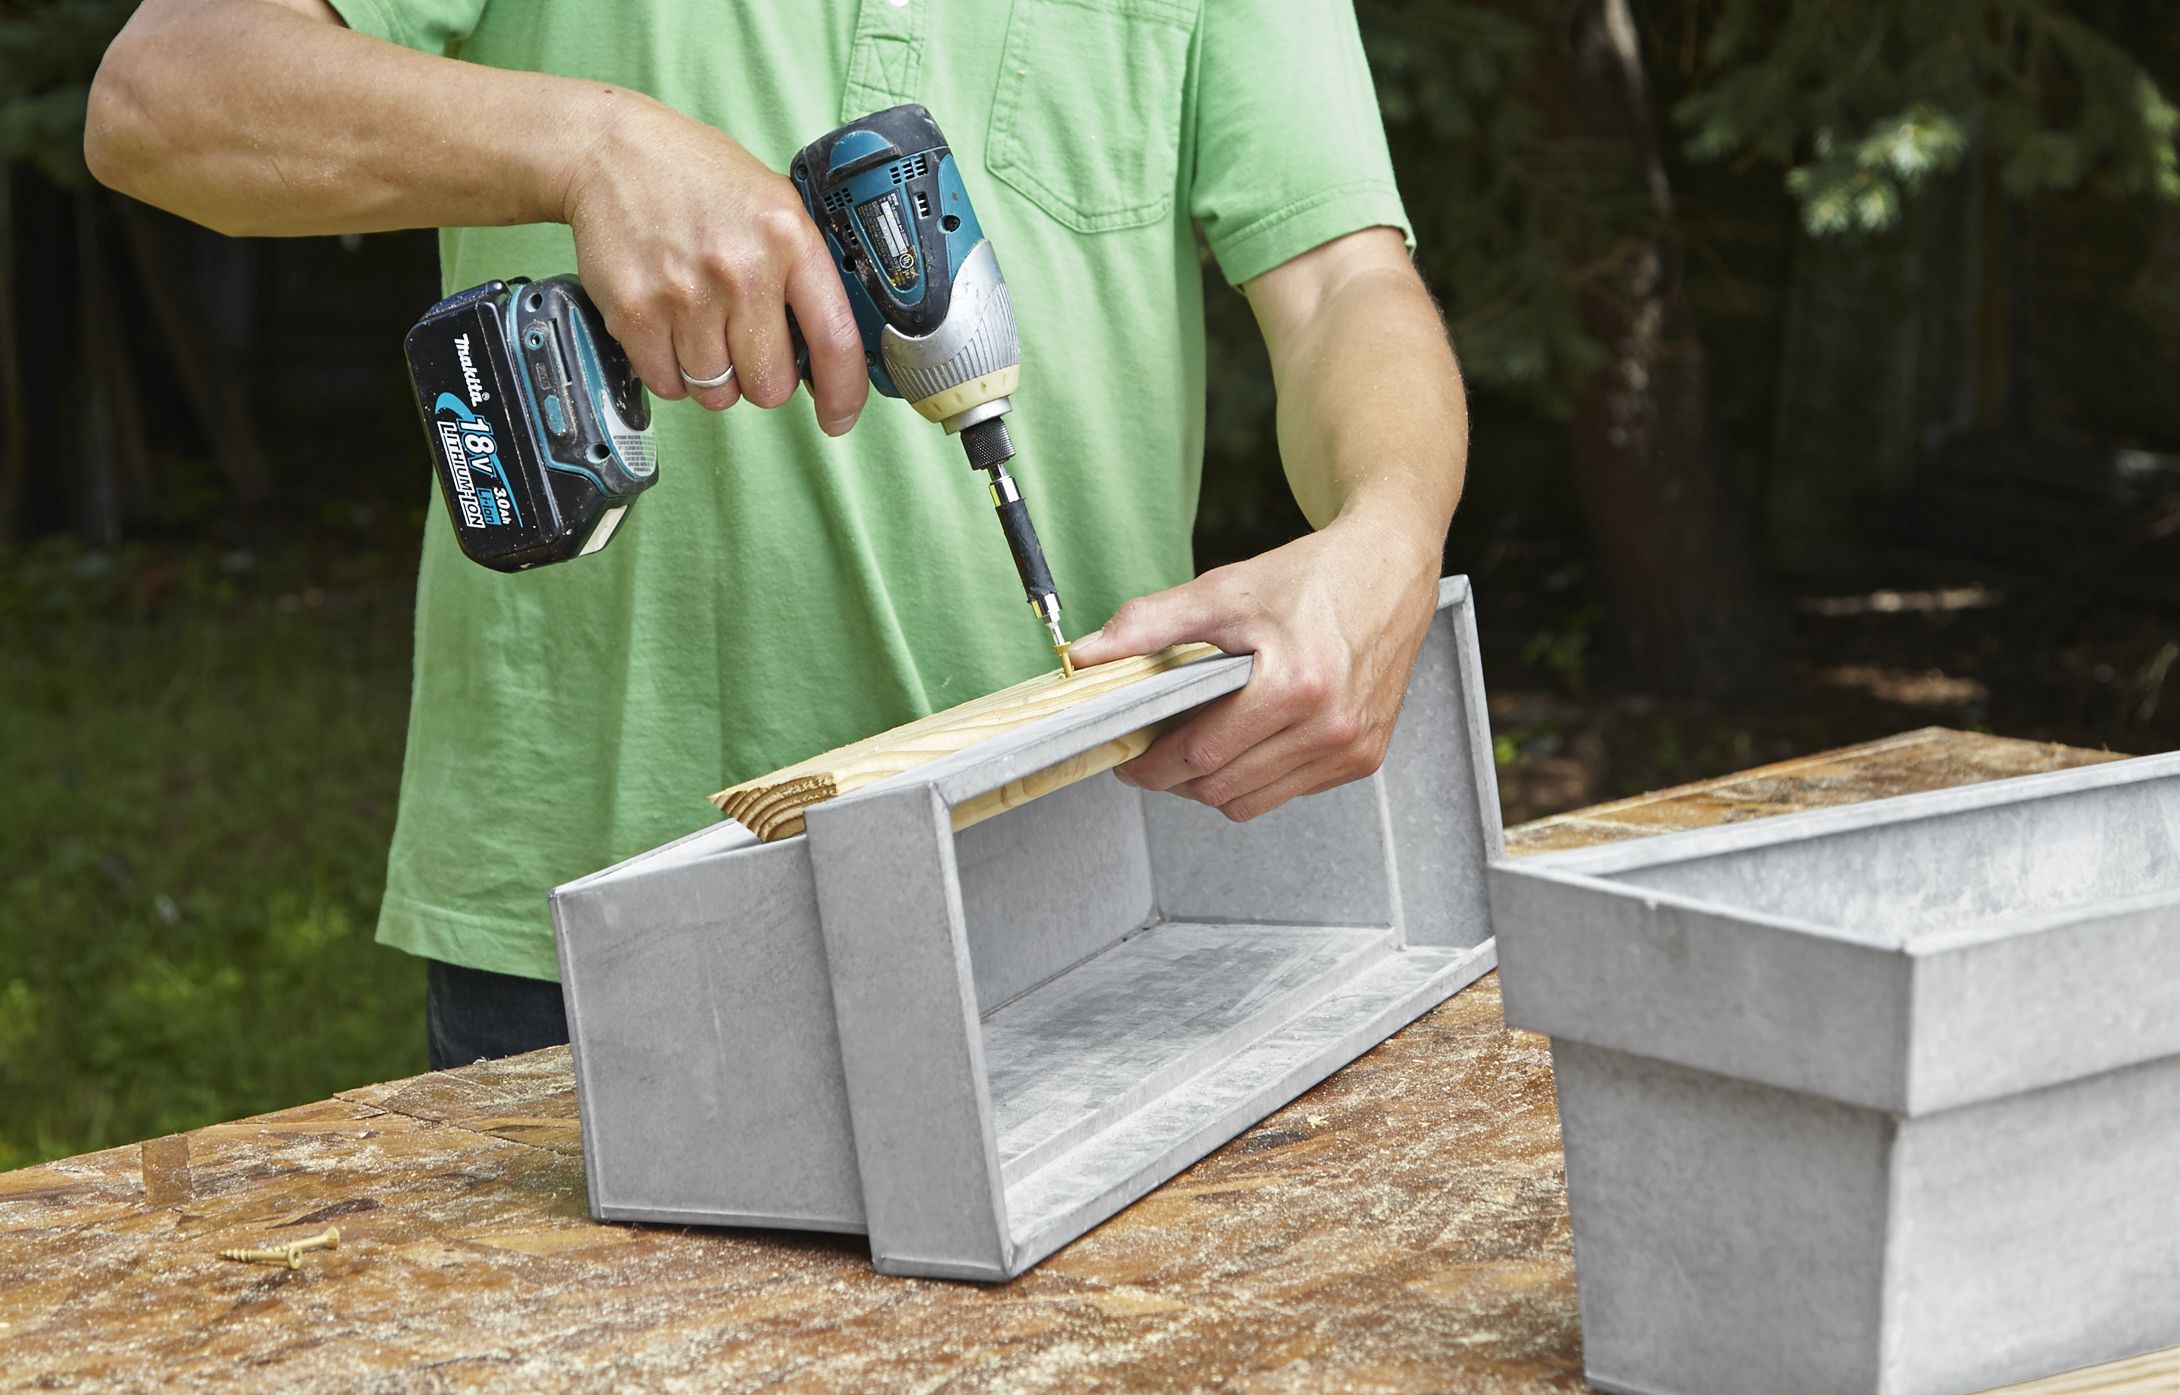
For the cleats, cut scraps of beveled rail slightly shorter than the width of each planter. Cut a 1×2 nailing block the same length as each cleat. Sandwich the upper lip of the planter between the nailing block and the cleat, with its bevel down and facing the planter. Clamp the pieces together, and drill pilot holes through the cleat and planter and into the nailing block. Fasten cleat to block with deck screws, as shown.
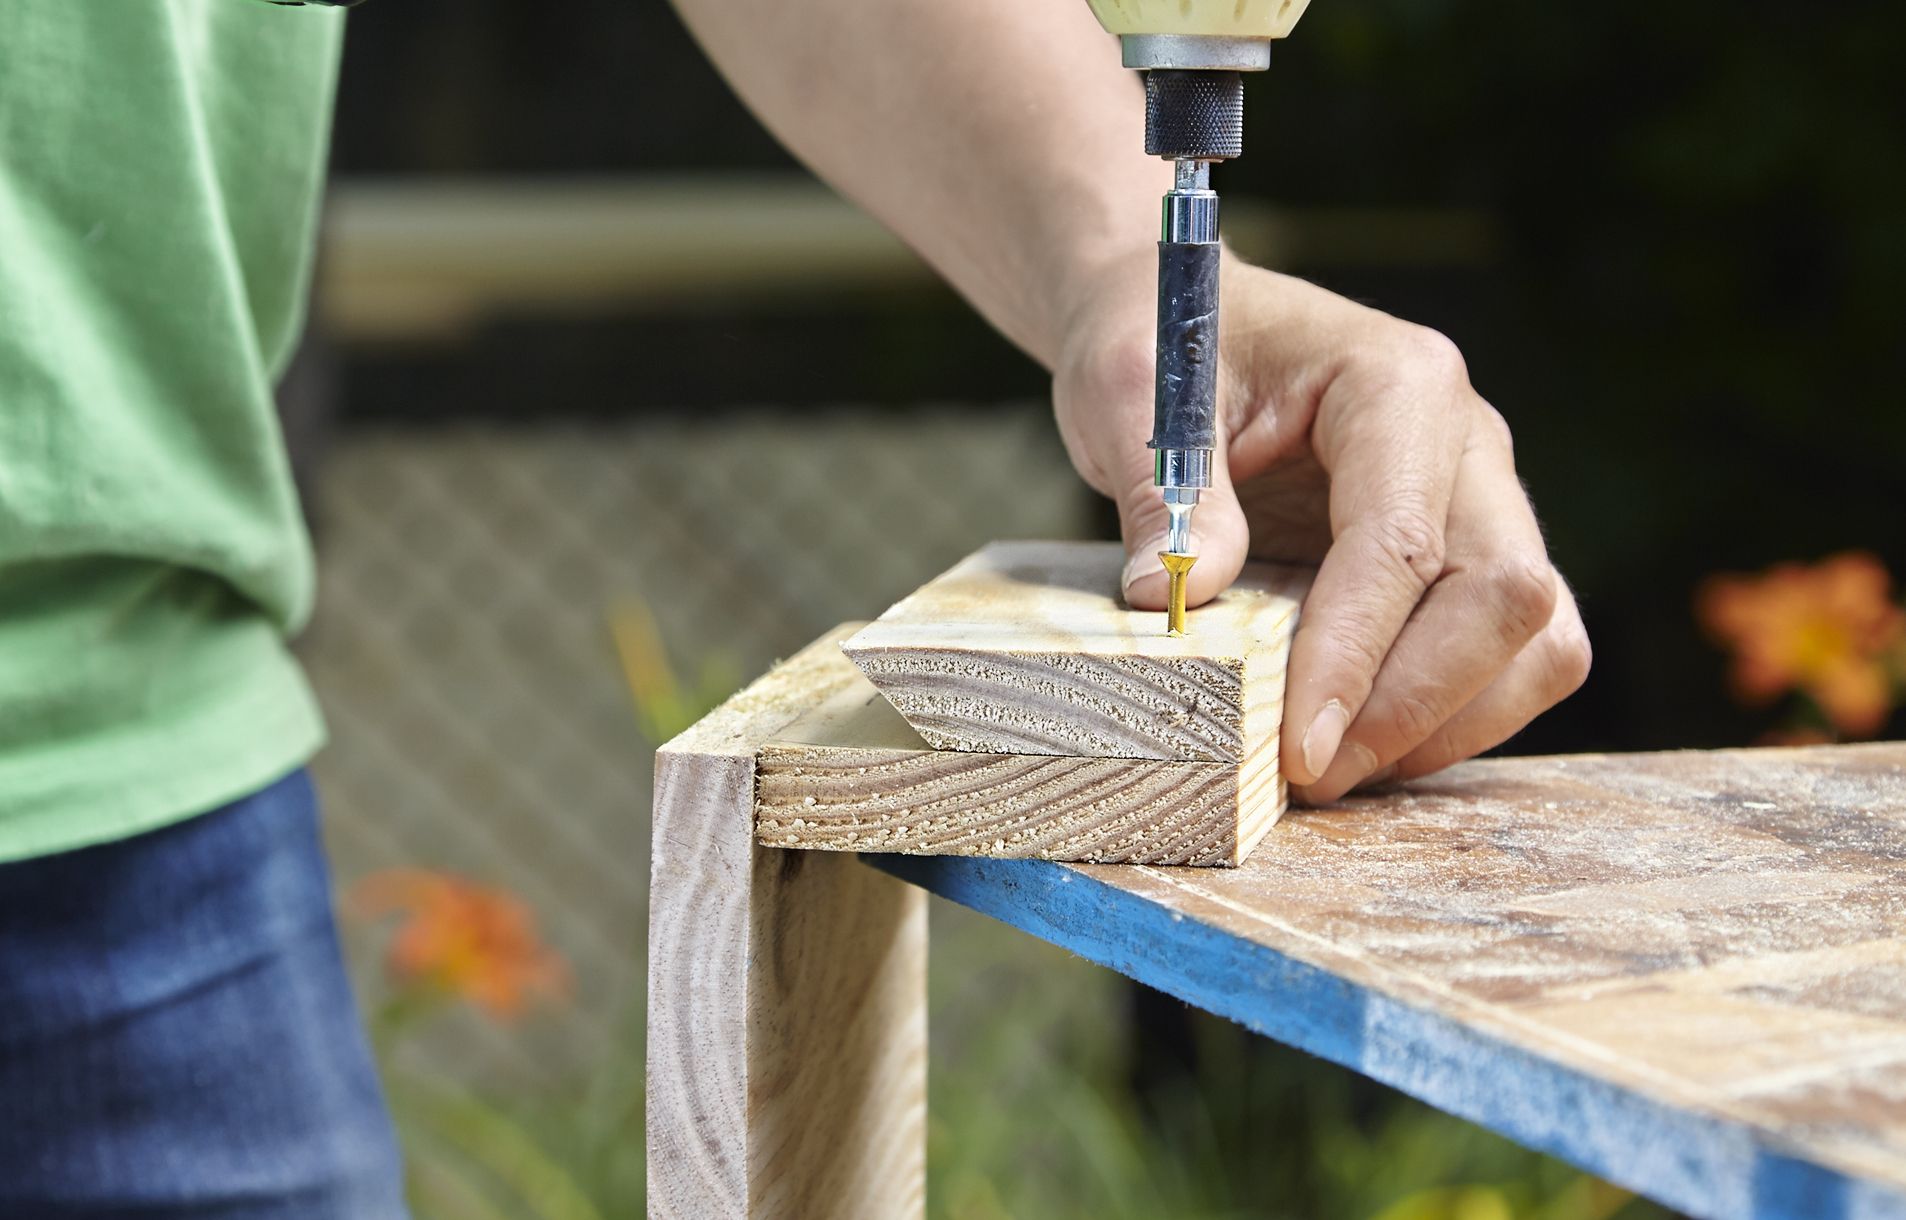
Cut a scrap piece of 1×6 and one of 1×4 to length, as well as a beveled cleat. Apply wood glue to the edge of the 1×4 and clamp it against the face of the 1×6. Drill pilot holes through the 1×6 and into the glued edge of the 1×4, and join the two pieces with deck screws. Fasten the cleat to the back of the shelf with deck screws, as shown.

Measure from the deck or the ground up to the bottom of the first rail, and cut two 2×4s to that length. Cut two more at least 4 inches longer. Pair the mismatched boards, even them up at one end, and fasten together with 2½-inch screws to make two braces. Use them to prop the frame in place against the wall. Fit your drill/driver with the 9-inch-long ¼-inch bit. At the center of each rail-upright intersection, drill a pilot hole through the frame and siding and into the stud, as shown.
To find the angle of your siding, butt a short piece of scrap against one course where it dead-ends into trim. Use the trim as a straightedge to mark the scrap, and use that piece to adjust the miter-saw blade to the correct angle. Cut 4-inch standoffs from 1-inch PVC pipe, one for each structural screw, making a straight cut on one end and a beveled cut on the other to match the angle of the siding.
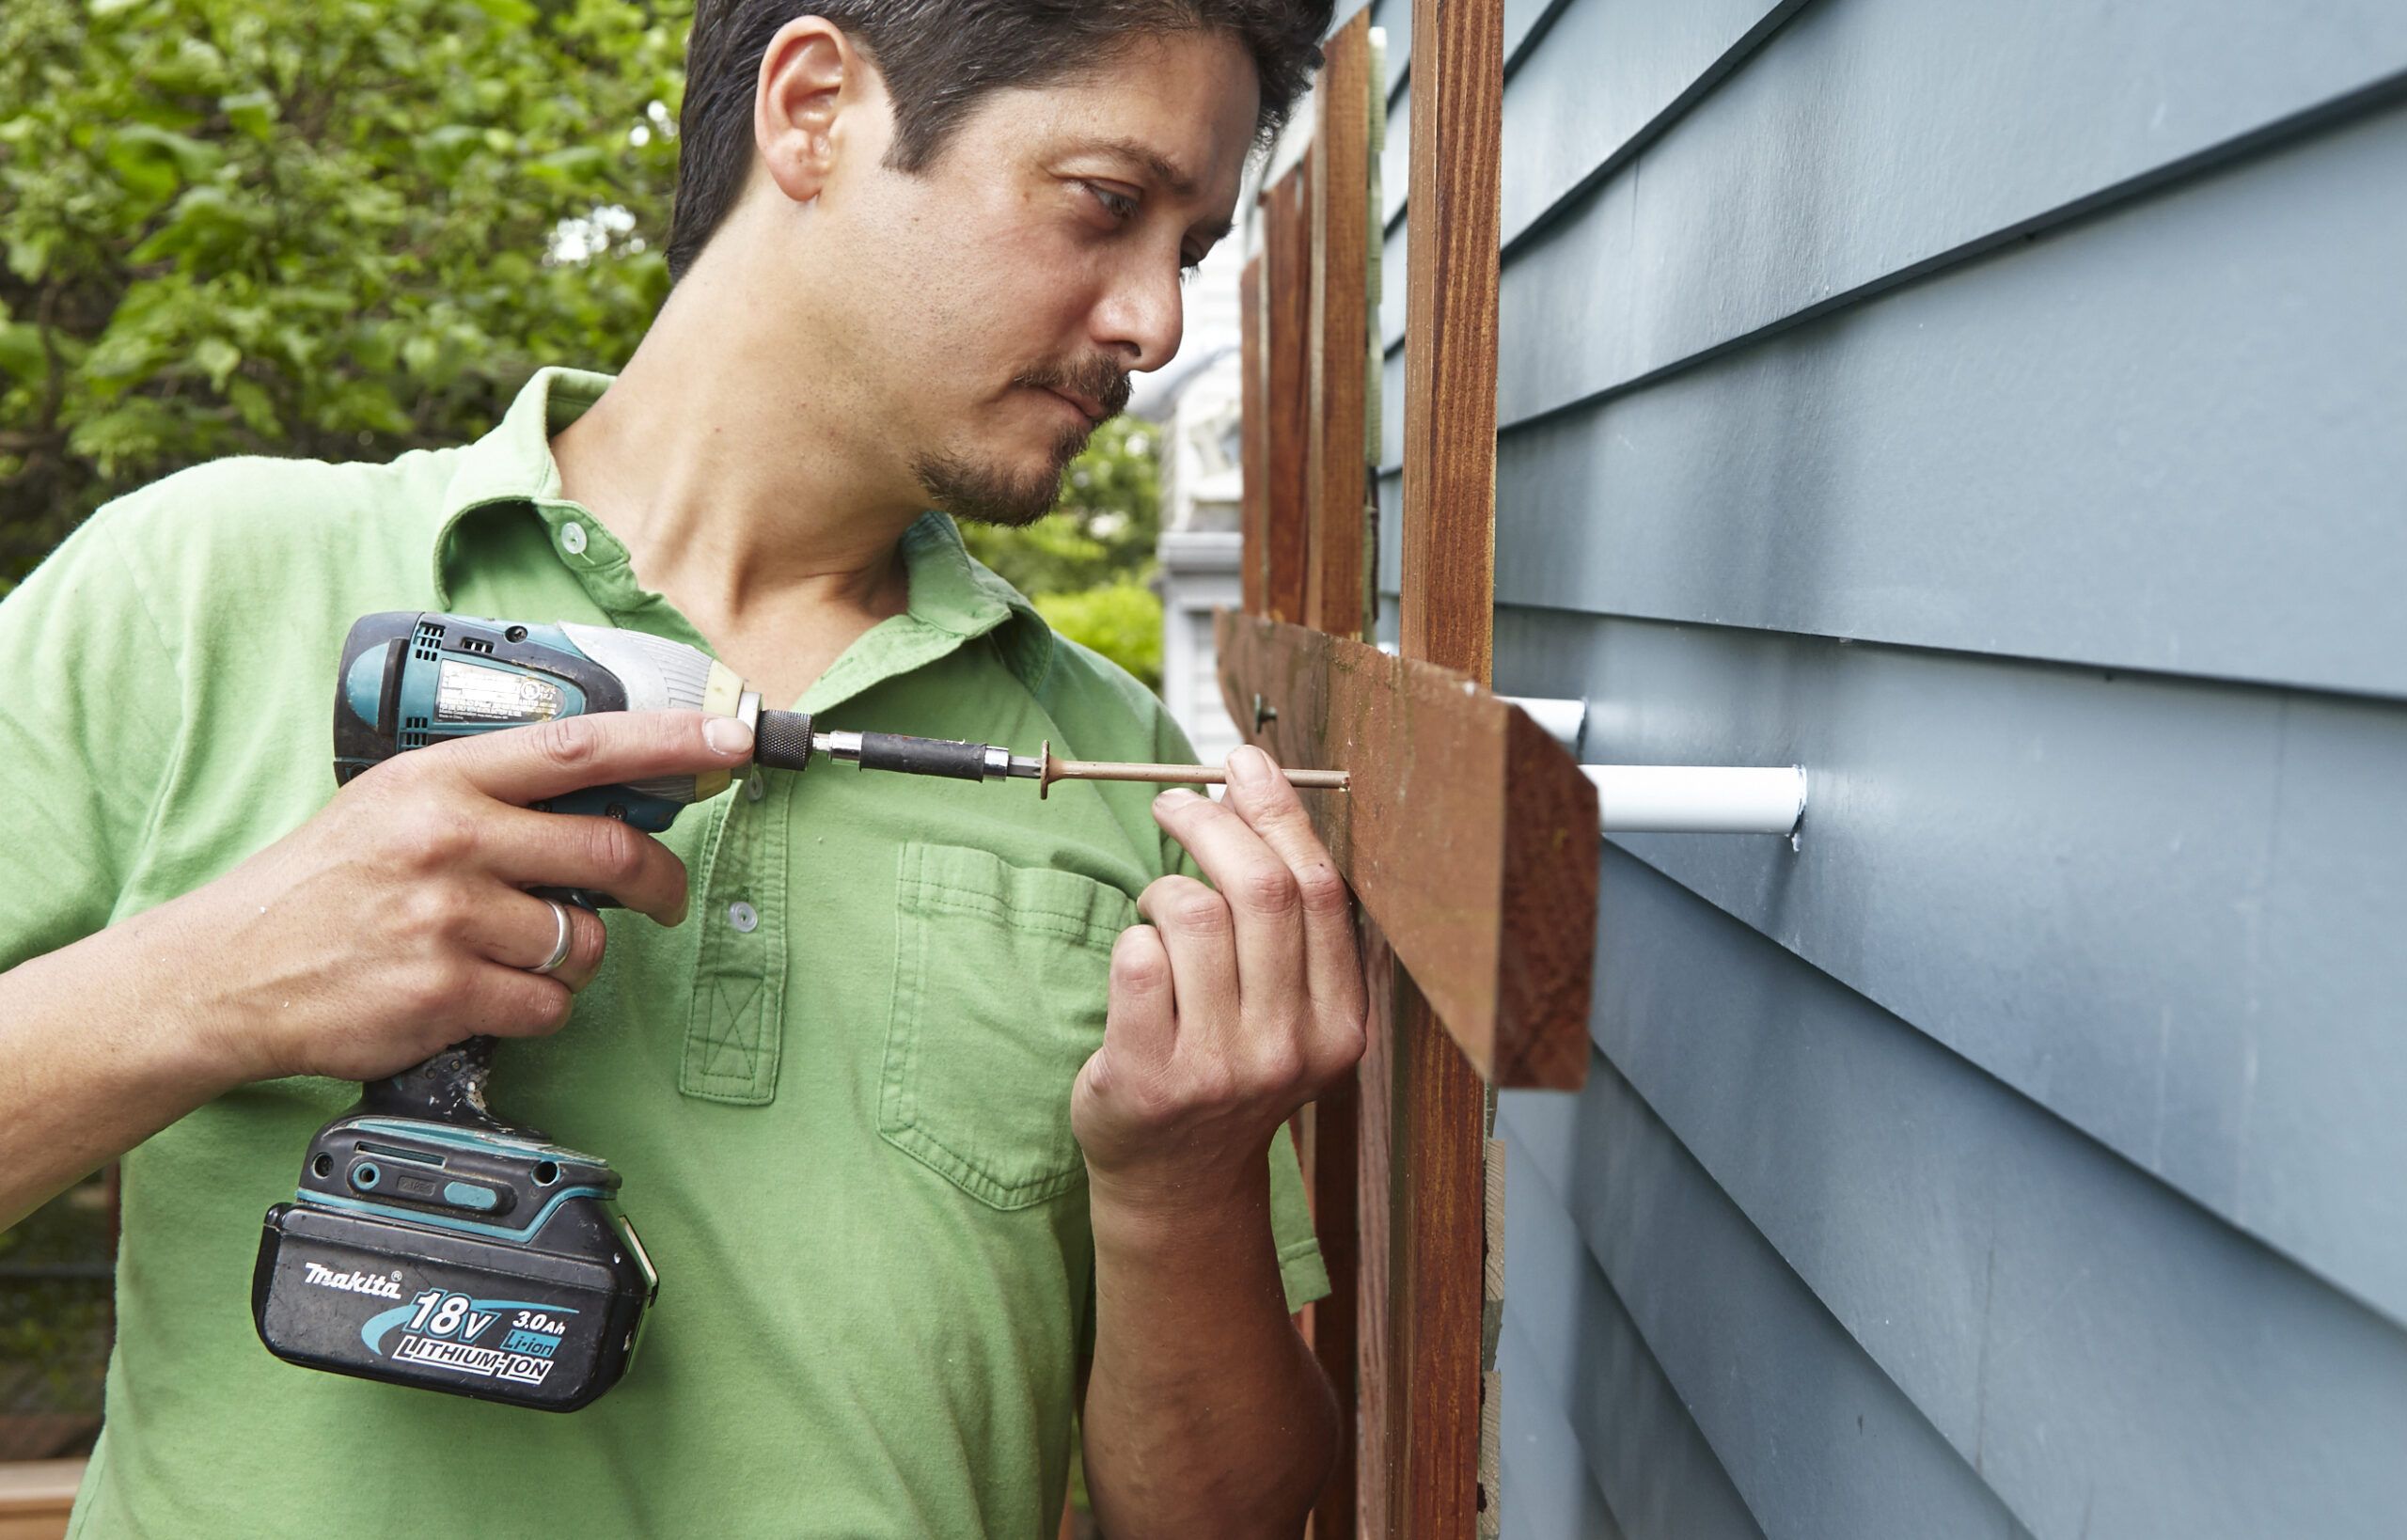
Find the intersection at the center of the frame and drive a structural screw through the pilot hole and the PVC standoff until its tip extends slightly past the standoff. Find the pilot hole in the siding with the tip of the screw. Run a bead of latex caulk around the beveled lip of the standoff, and drive the screw into place. Check the frame for level and secure the rest of the intersections the same way. Remove the braces.
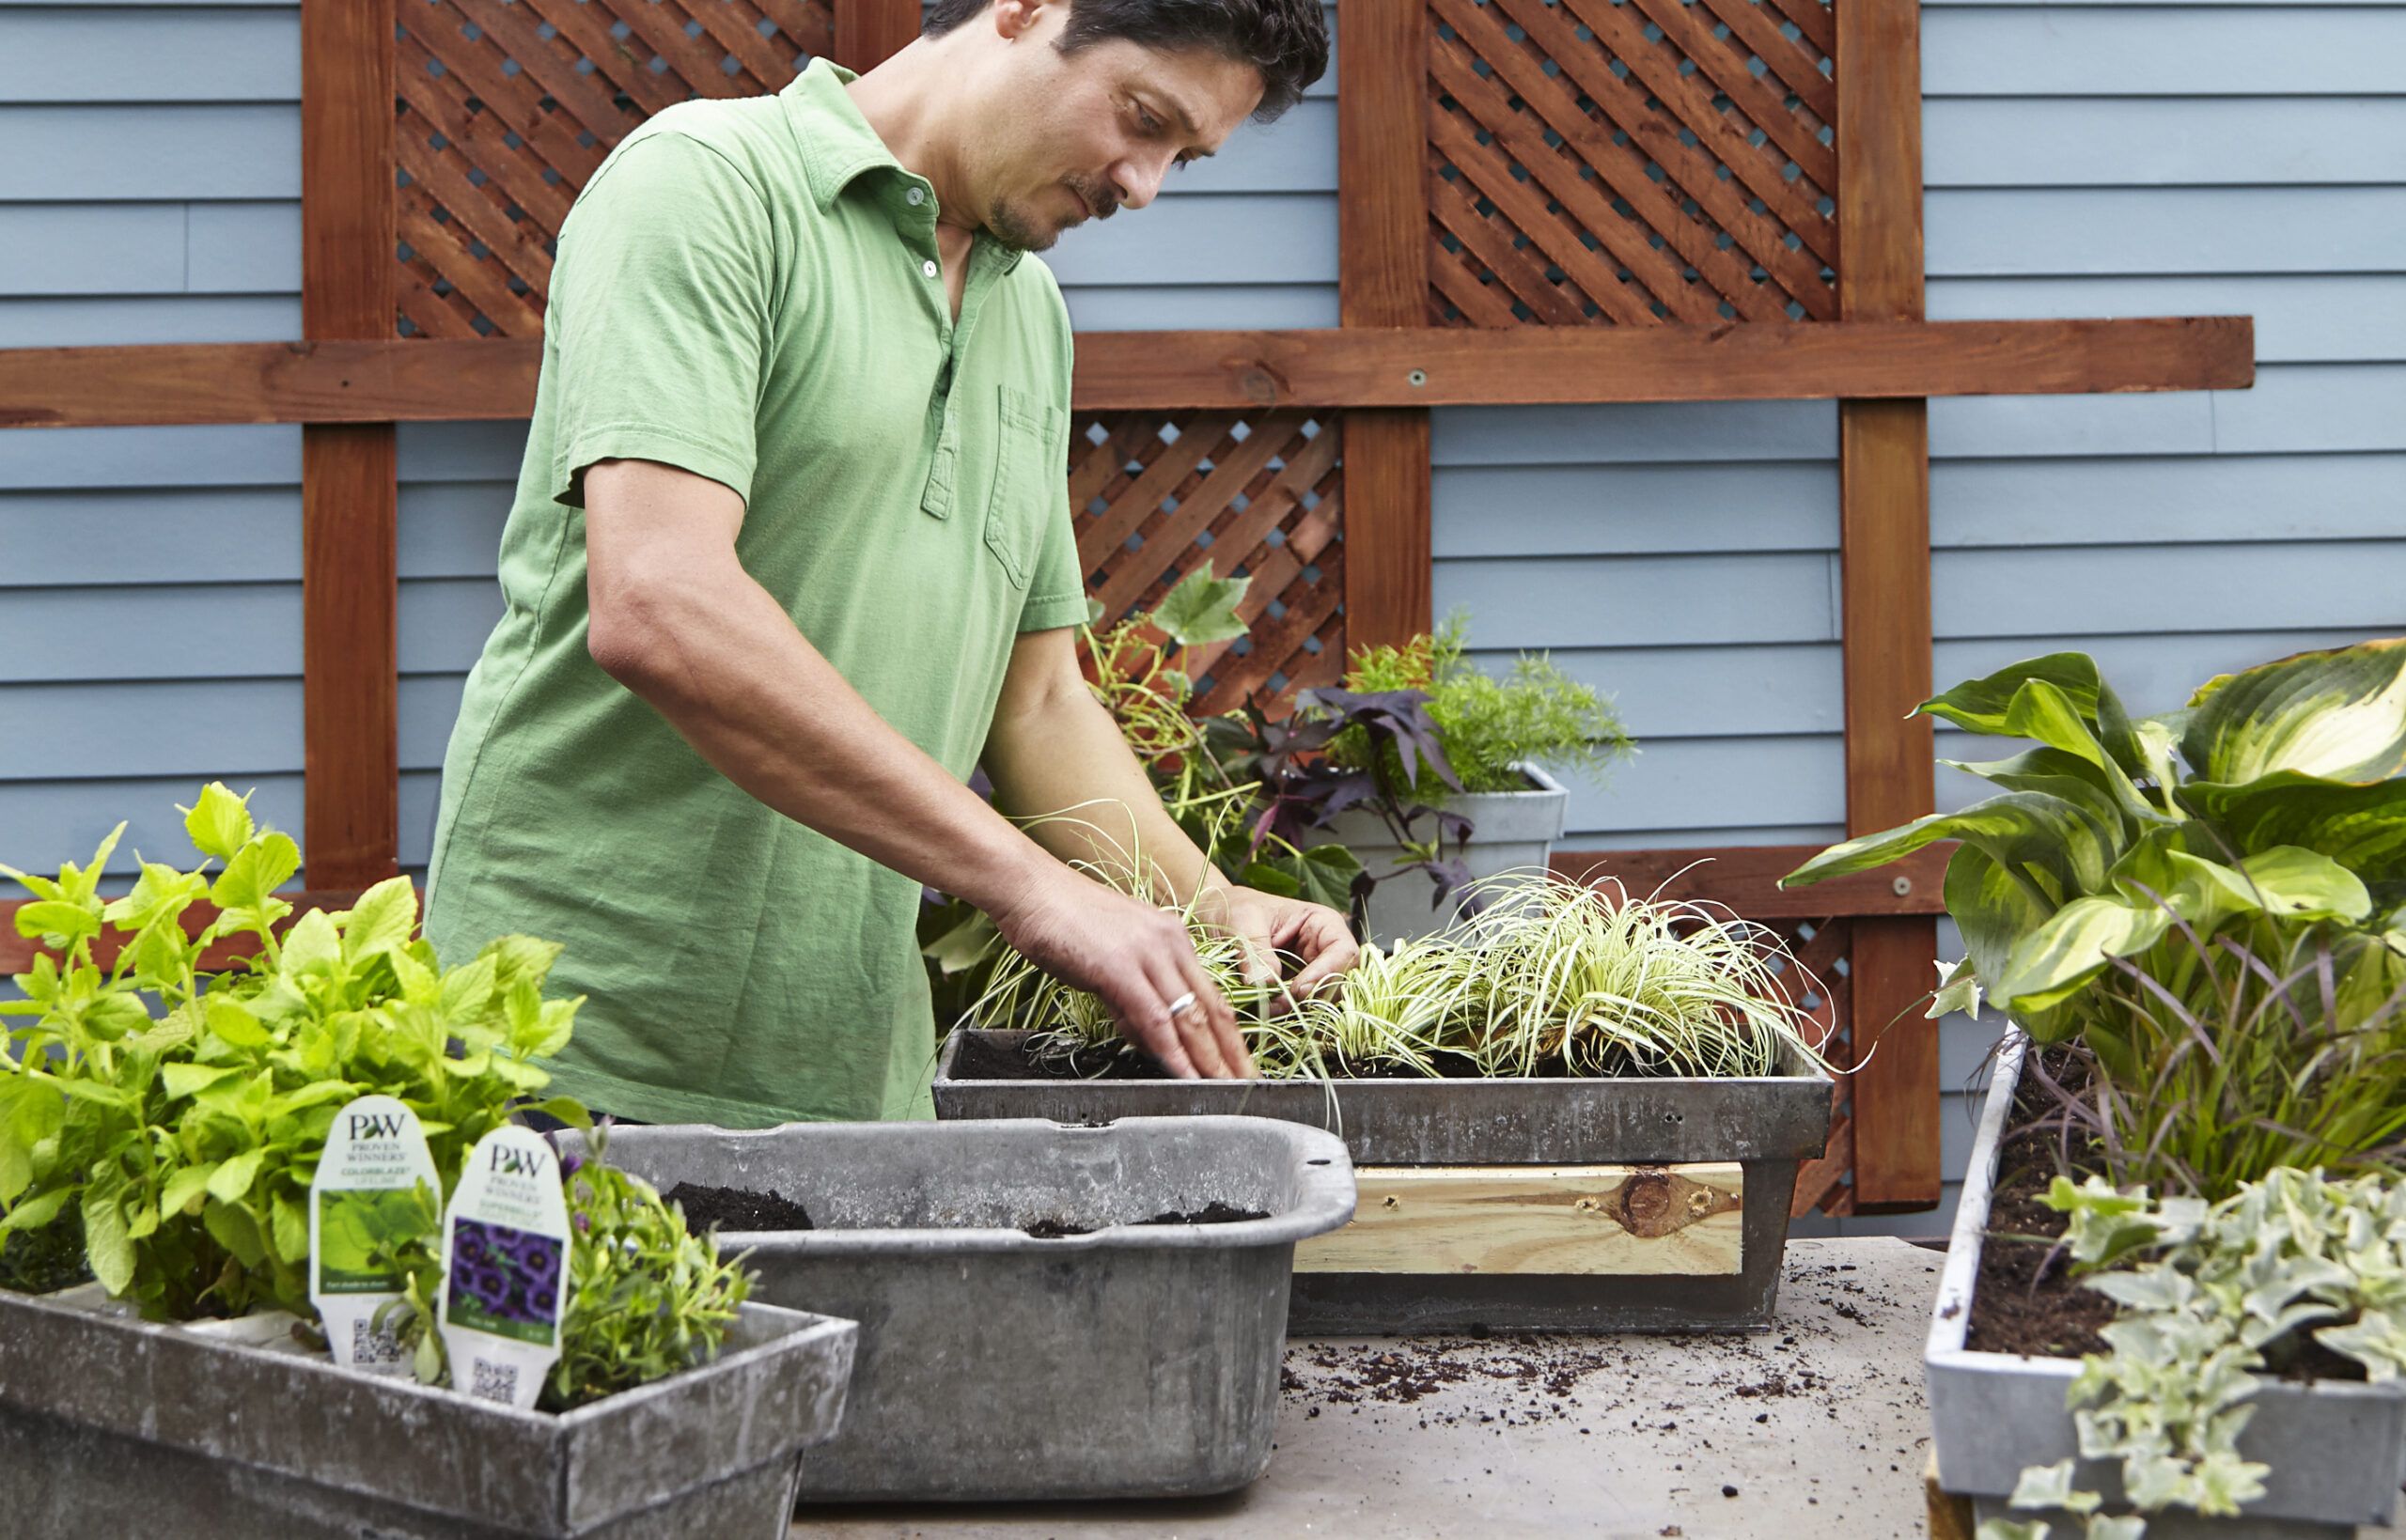
Fit your drill/driver with a ¼-inch bit and drill a series of drainage holes in the bottom of each metal planter. In a bin, combine 2 parts potting soil with 1 part planting mix, and fill the planters with the mixture. Make holes and set the plants in place. Cover the roots with the soil mix, tamping it down gently.
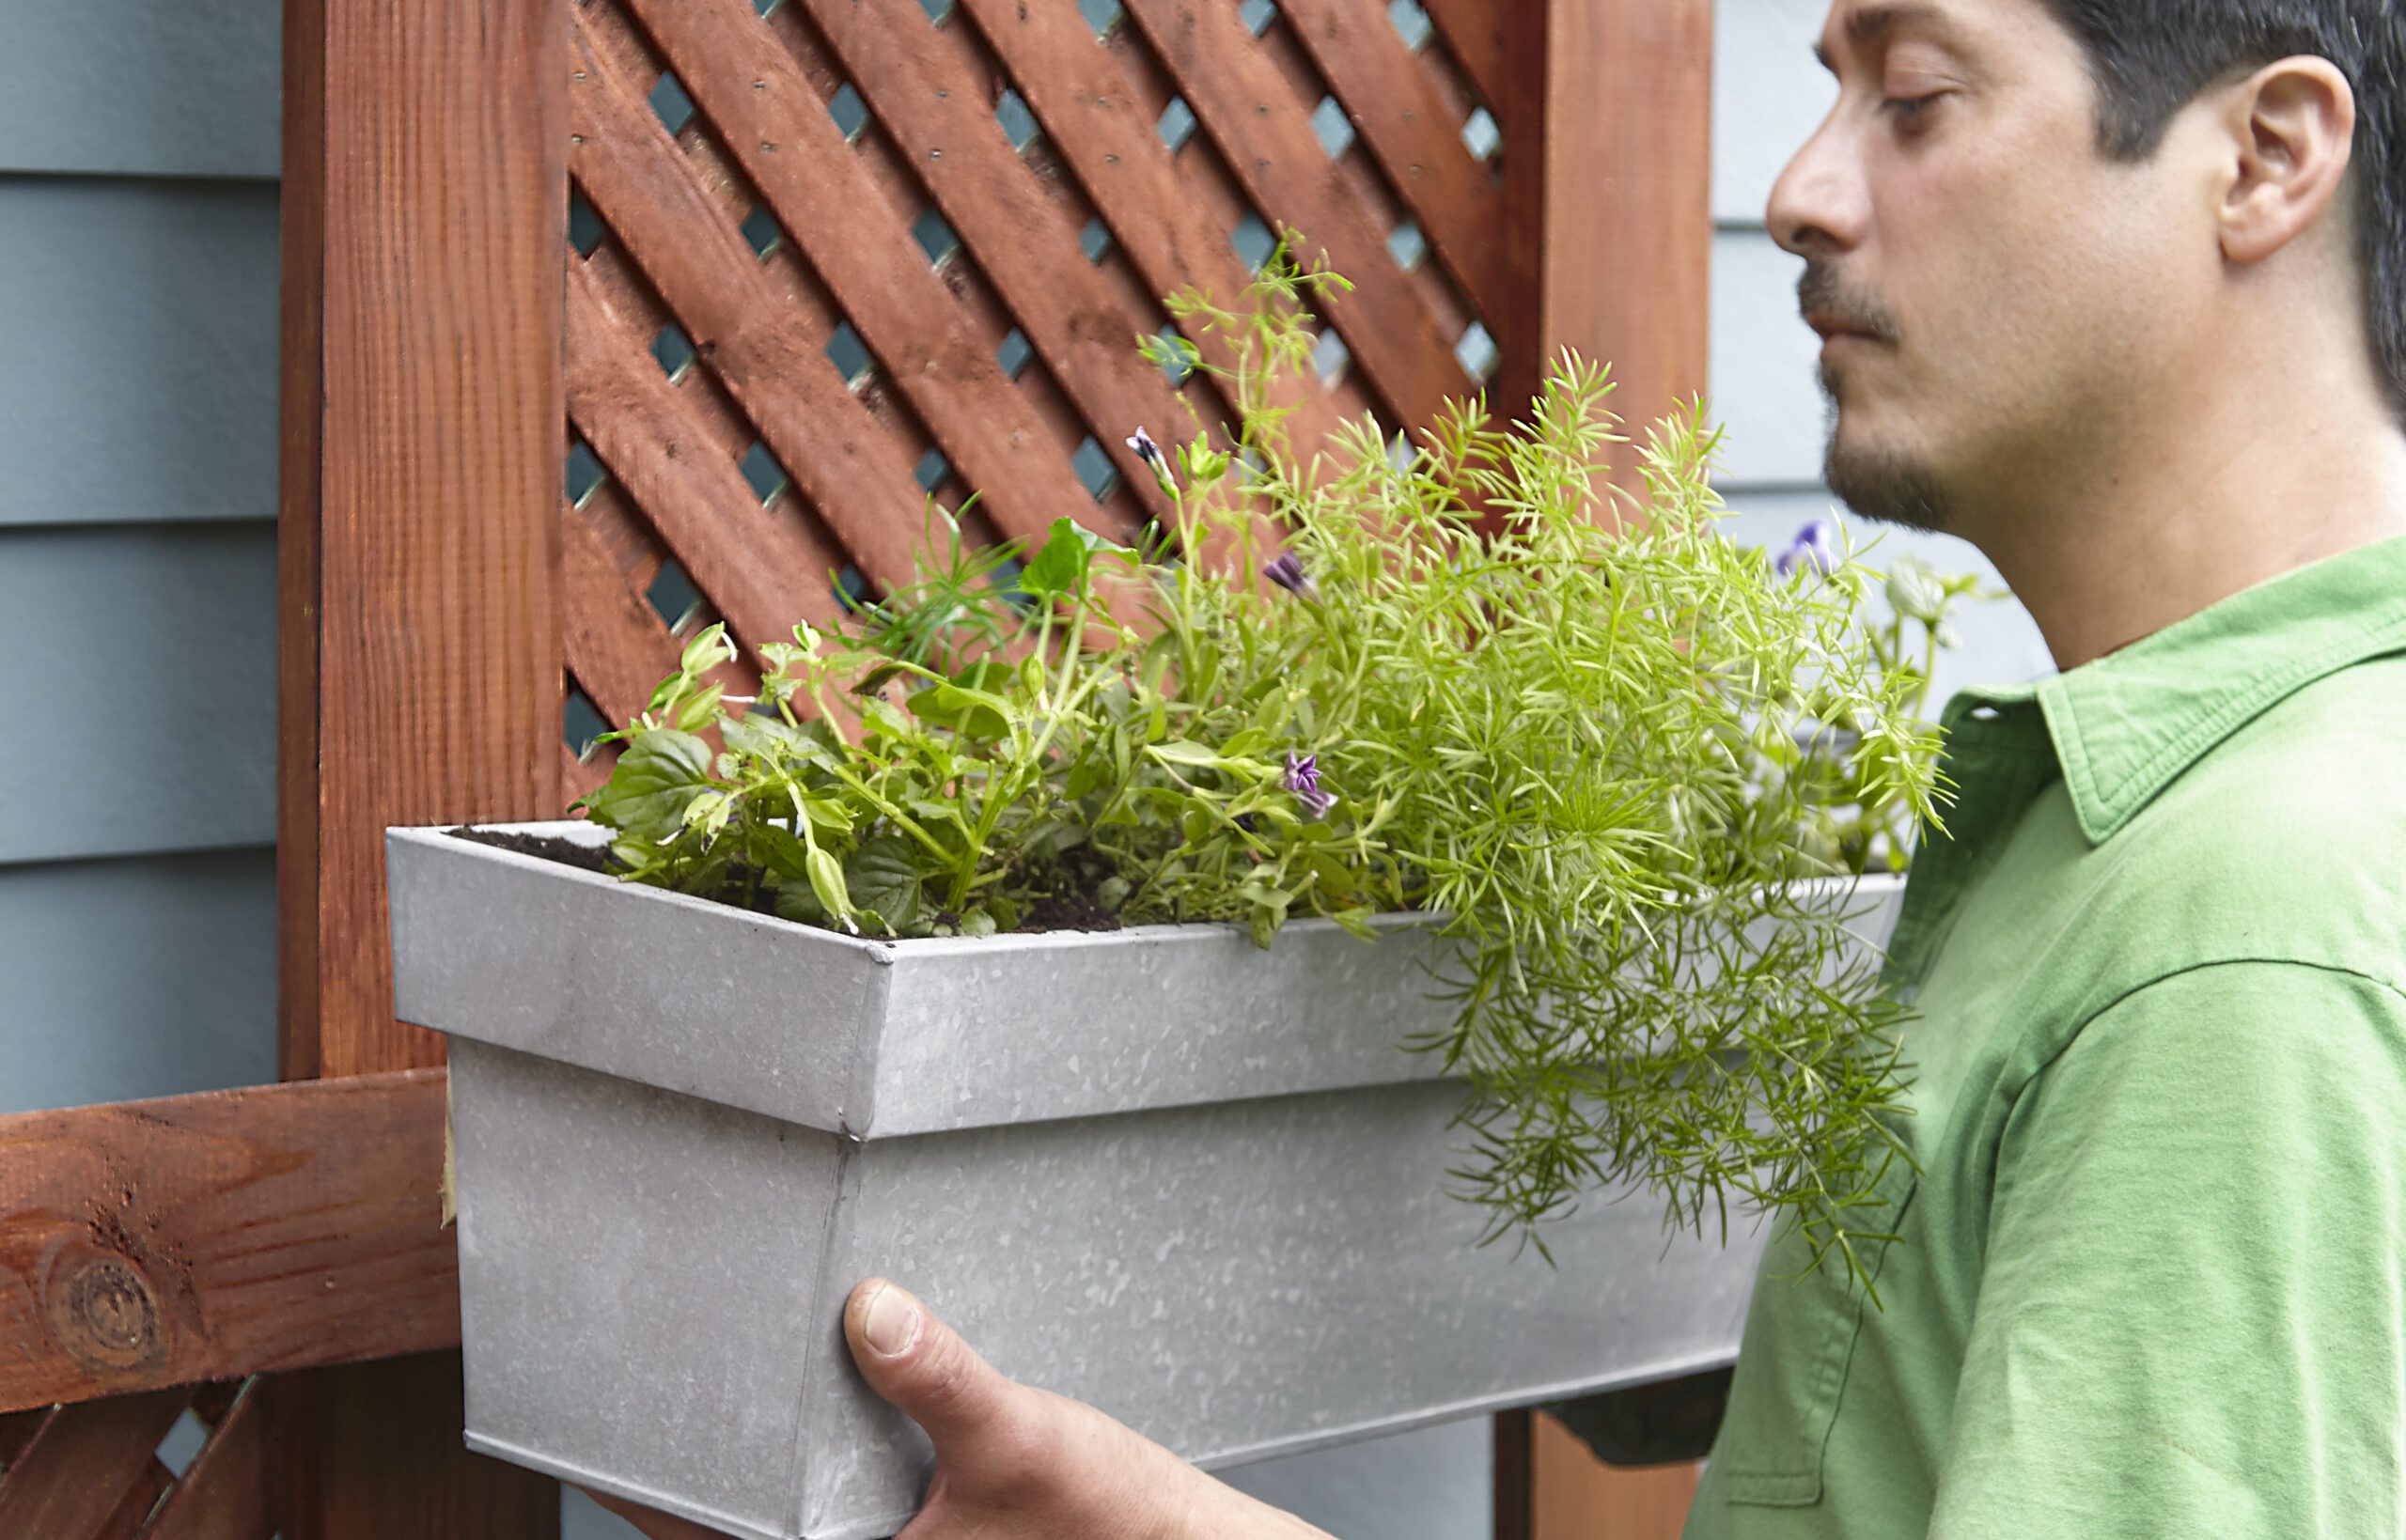
Arrange the planters and shelves by hooking the beveled cleats on the hanging rails. Position climbing plants and vines below lattice panels, and, using vinyl plant tape, loosely tie hanging stems to the lattice to train them. Water the plants generously, especially at first, and enjoy watching them grow in.
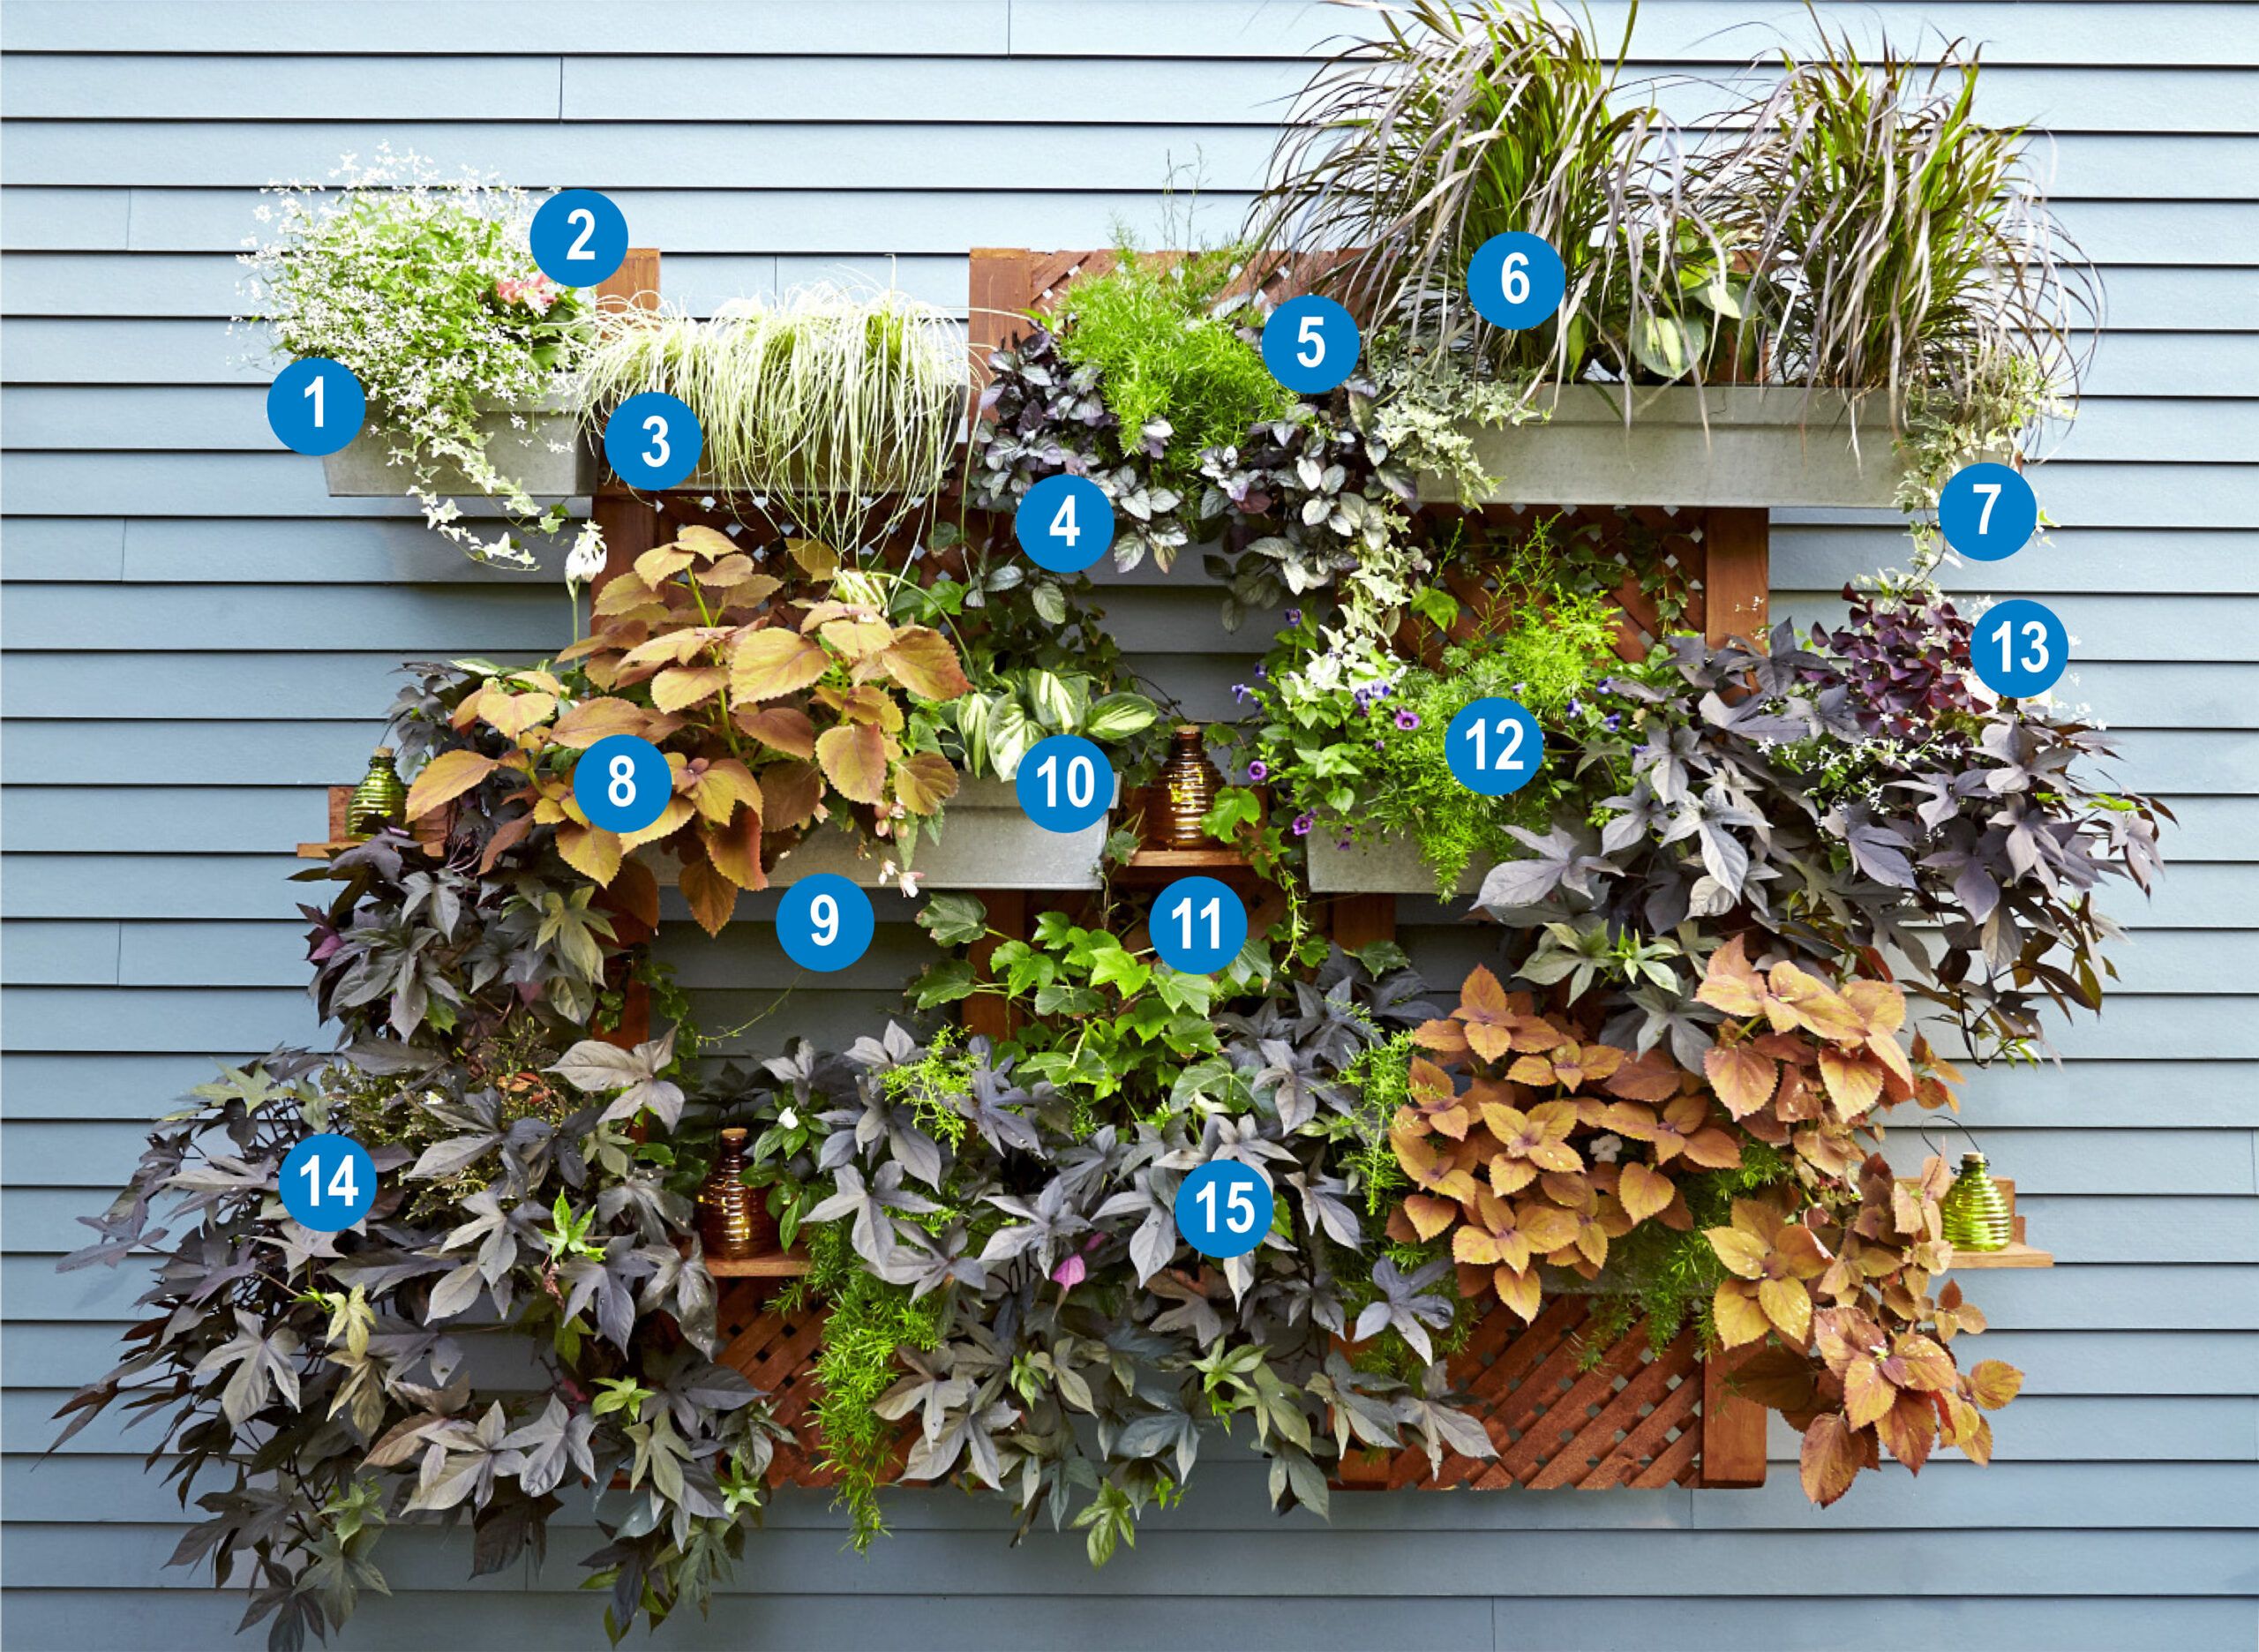
Low-maintenance plants that bring color to your wall.
1. Euphorbia ‘Diamond Frost’
2. New Zealand impatiens (pink)
3. Striped weeping sedge ‘Evergold’ (Carex oshimensis ‘Evergold’)
4. Red flame ivy (Hemigraphis alternata)
5. Asparagus fern ‘Sprengeri’
6. Red fountain grass (Pennisetum rubrum)
7. Variegated English ivy
8. Coleus ‘Sedona’
9. Angel wing begonia ‘Angel Falls’
10. Hosta ‘Hudson Bay’
11. Boston ivy ‘Green Showers’
12. Superbells Miss Lilac (Calibrachoa hyb.)
13. Purple shamrock
14. Coleus ‘Cranberry Bog’
15. Sweet potato vine ‘Blackie’ (Ipomoea batatas ‘Blackie’)